

Words: Liam Friary and Cameron Mackenzie
Images: Cameron Mackenzie
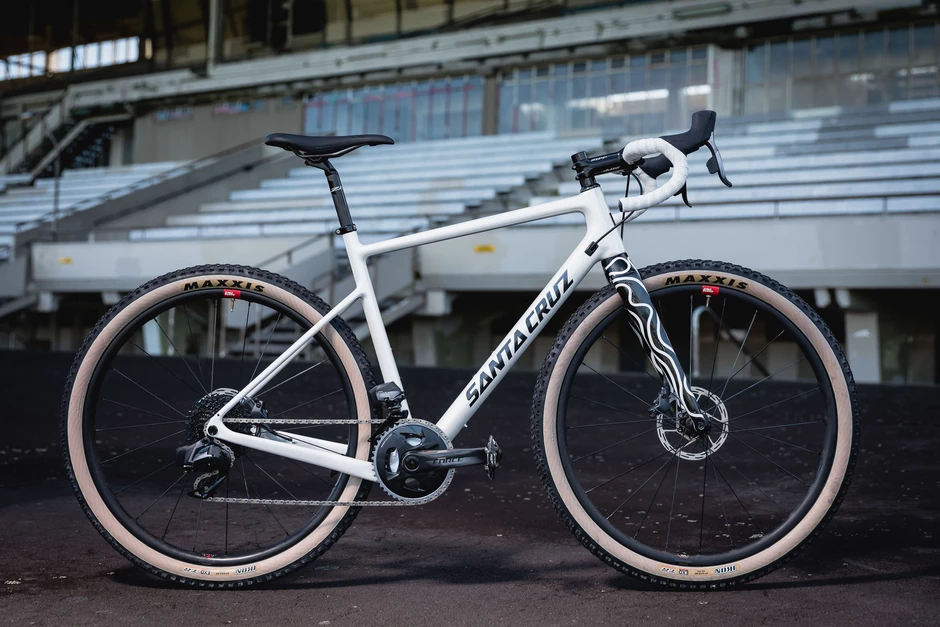
This is the fourth edition of our bike build series, in which we feature the latest goods and/or the fruitiest parts, then build up a unique frameset. To be honest, we have had the Santa Cruz Stigmata for more than a year now and it’s been used on several adventures. So, when the announcement came for the new SRAM Force Wide AXS groupset, I knew it would be the perfect match. After a few internal discussions, we decided it would be best to give the Santa Cruz a new lease on life with a fresh paint job.
The Concept
As the Santa Cruz Stigmata frame was battered and bashed from numerous gravel adventures, it needed a complete overhaul. We got the bike a little more than year ago when it first launched to market and it’s been a solid ‘go-to’ steed. I was always a little unimpressed with the groupset, though. It was 2×11 Shimano Ultegra ft. their Ultegra RX clutched derailleur, which I think was more tailored towards ‘gravel race’ than ‘gravel adventure’. I found it became laboursome and I’d run out of gears when hauling up and over steep inclines. So, being able to fit the new SRAM Force Wide AXS groupset to this rig made for a good test.
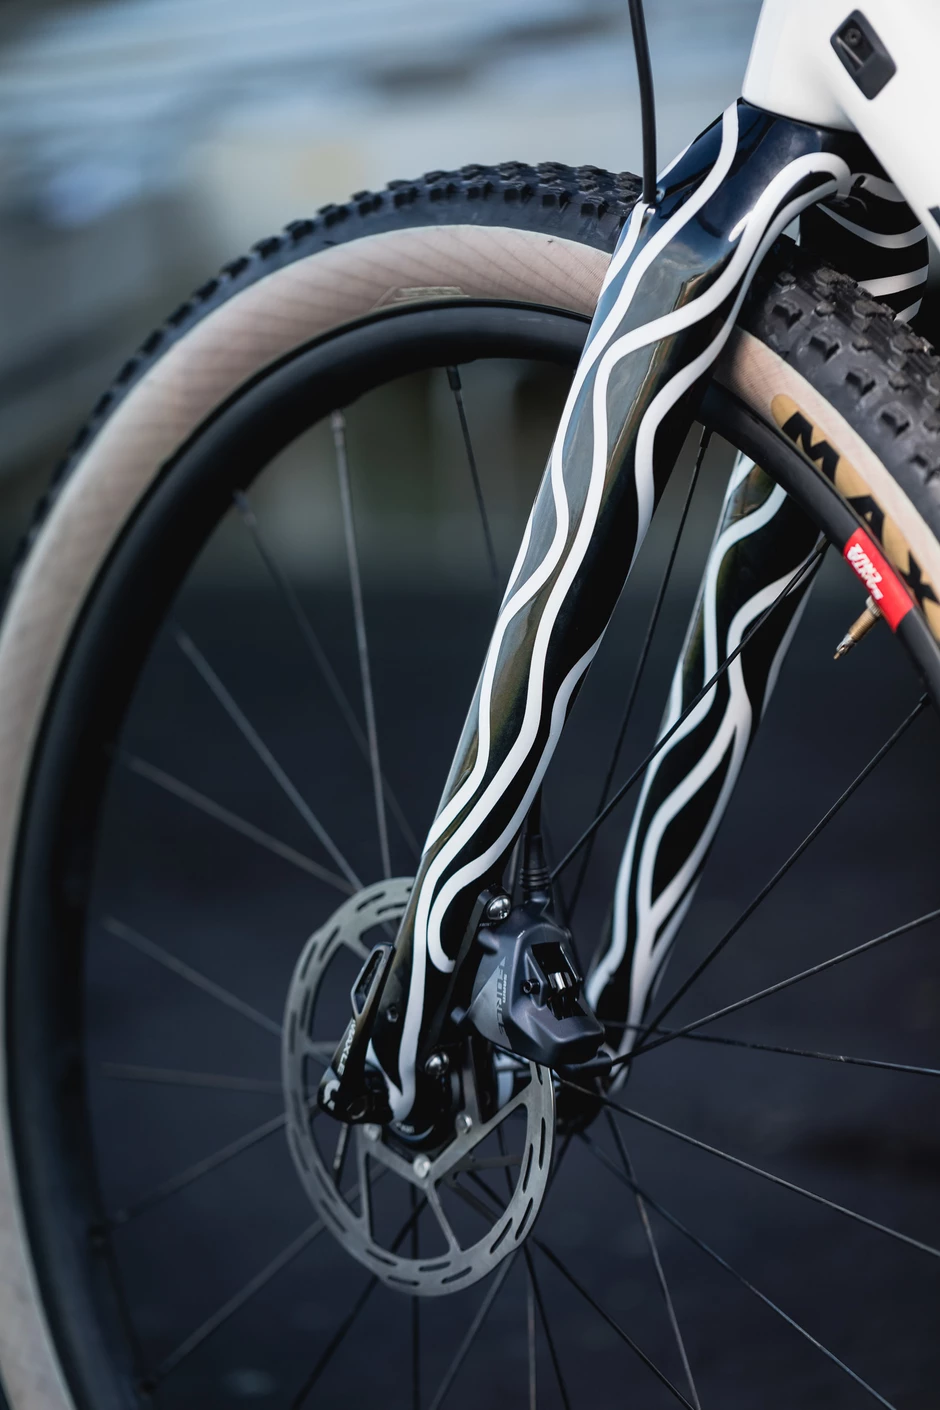
We got wind of a custom bike painter, Matt Brook, and immediately gave him a call. We made arrangements to drop the bike off and I hustled to get the bike dropped off to Cameron Mackenzie as he would strip it down to just the frame. Once that was done we dropped it off to Matt’s workshop. The colour choice was always going to be simple; pearl white frame with a custom painted fork. The frame paint job was simple, the fork, however, was not so much.
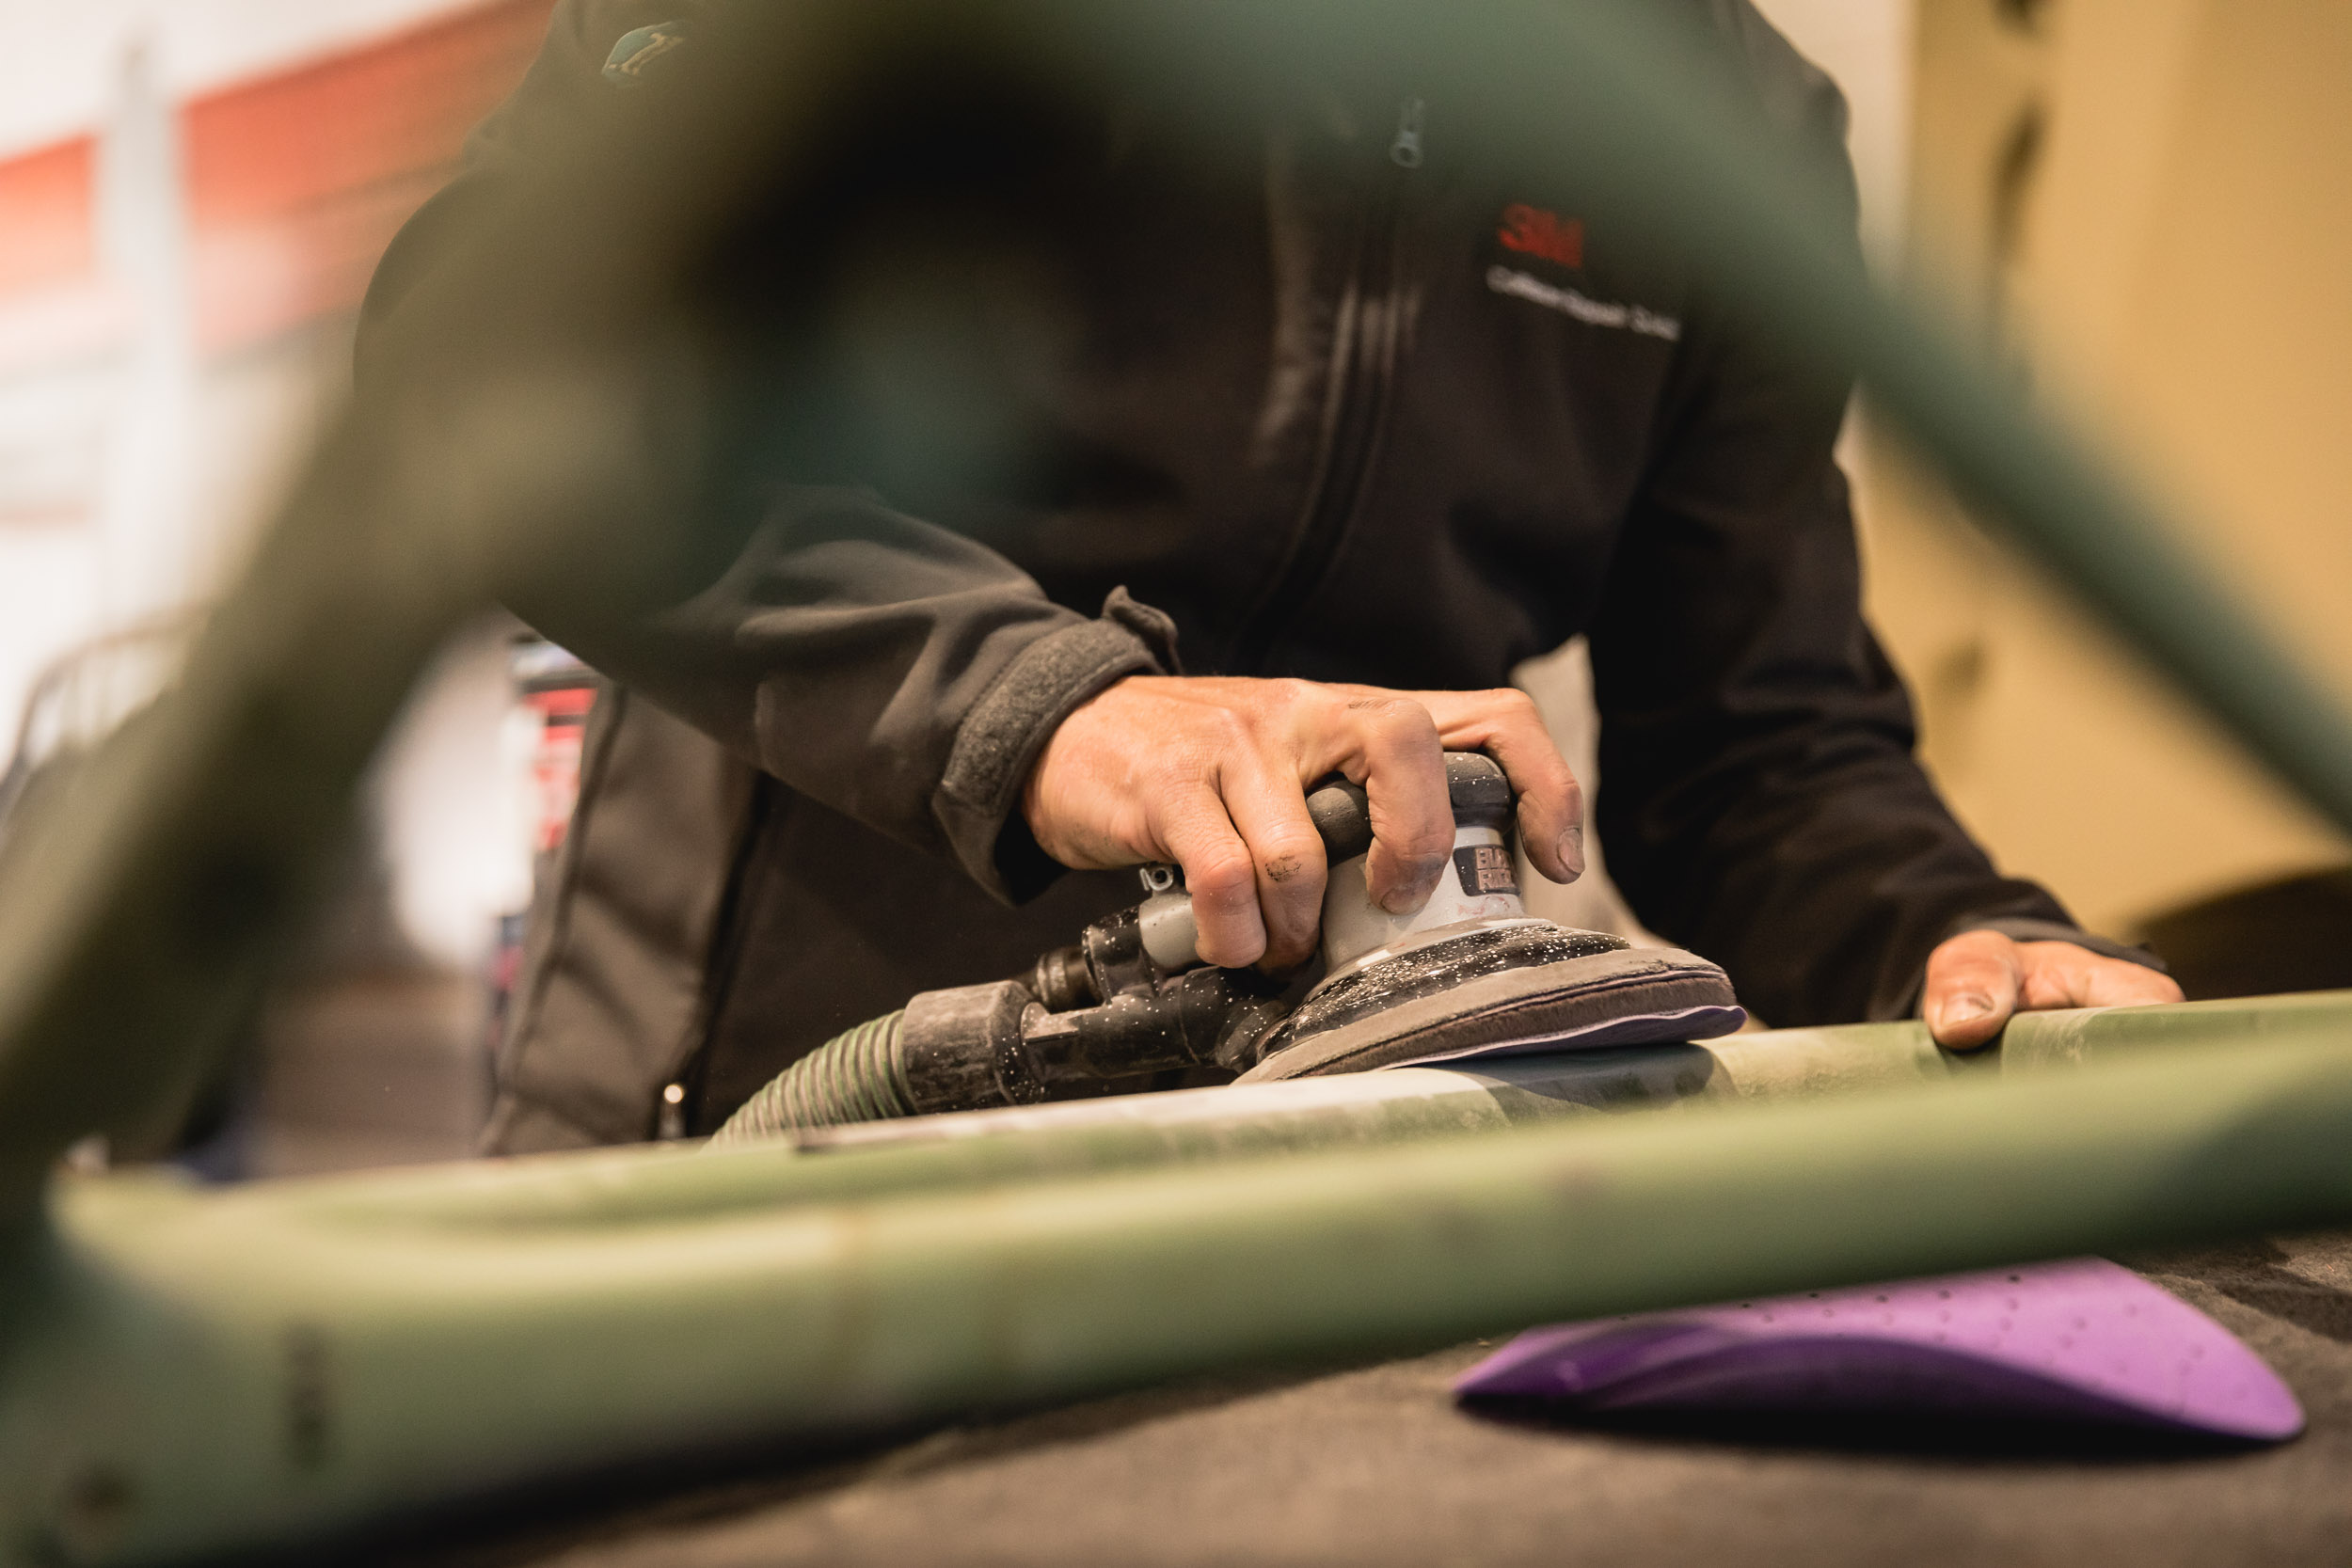
Cameron Mackenzie explains: Stripping the bike was a straightforward affair, but attention needed to be given to the little details. Things like how any rubber guards or plugs, were fitted and adhered, where bearing surfaces were, cable guides and all the little grub screws and bolt holes. All this info needed to be passed on to Matt so that he could mask off areas where paint wasn’t meant to be, and all the threads could be filled with bolts to prevent paint blocking them up.
I was fortunate enough to be able to drop the frame off in person, so I was able to handover info around the key points and those little details, and document the process of the prep, stripping and a little of the painting. At the time we did this, our first lockdown was stepping down into the lower levels, so I wasn’t able to be there for everything, only select moments, touching on different steps in the process.
Going into the painting process, I was surprised to learn of the wide scope around how you can approach the process. My first look into this was in the stripping of the old paint. I expected Matt to take out a knife and scrap the paint off, or sand all of frame right back to the bare carbon but, instead, he only wanted to sand back the logo and high-wear areas to create an even surface. He cleaned and sanded the rest of the frame thereafter, but only enough to roughen up the old paint enough so that the new paint had something to cling to.

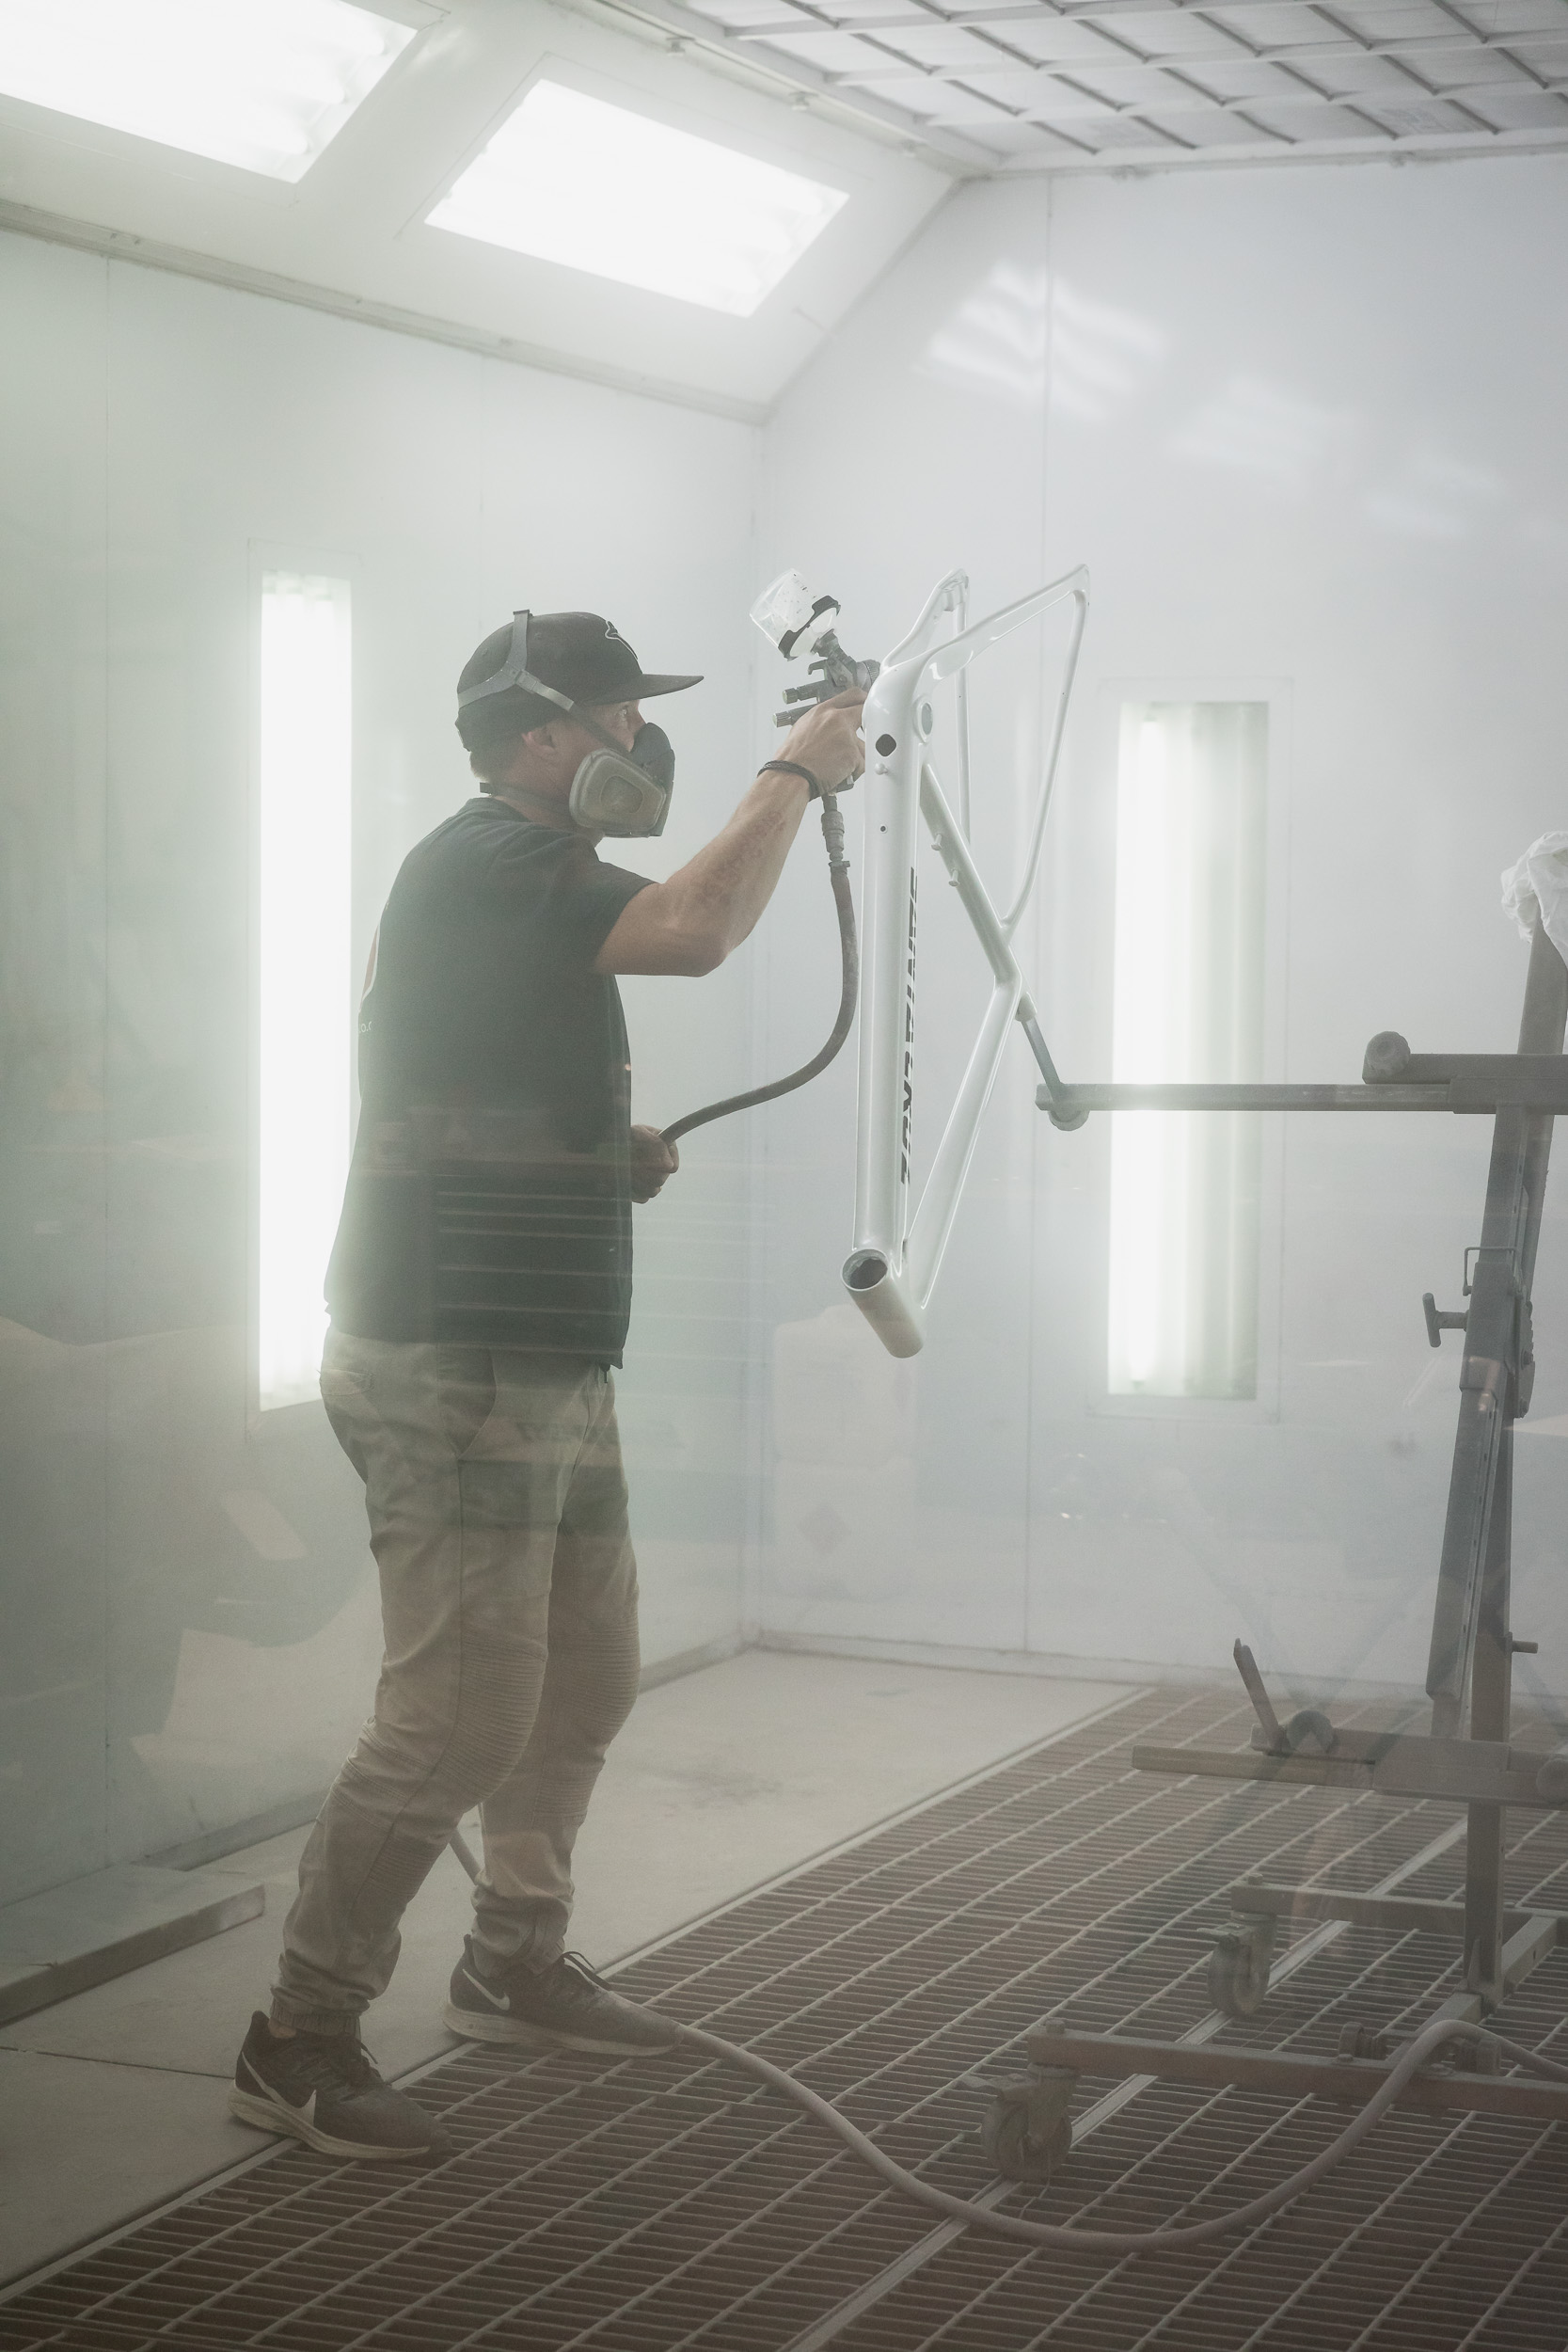
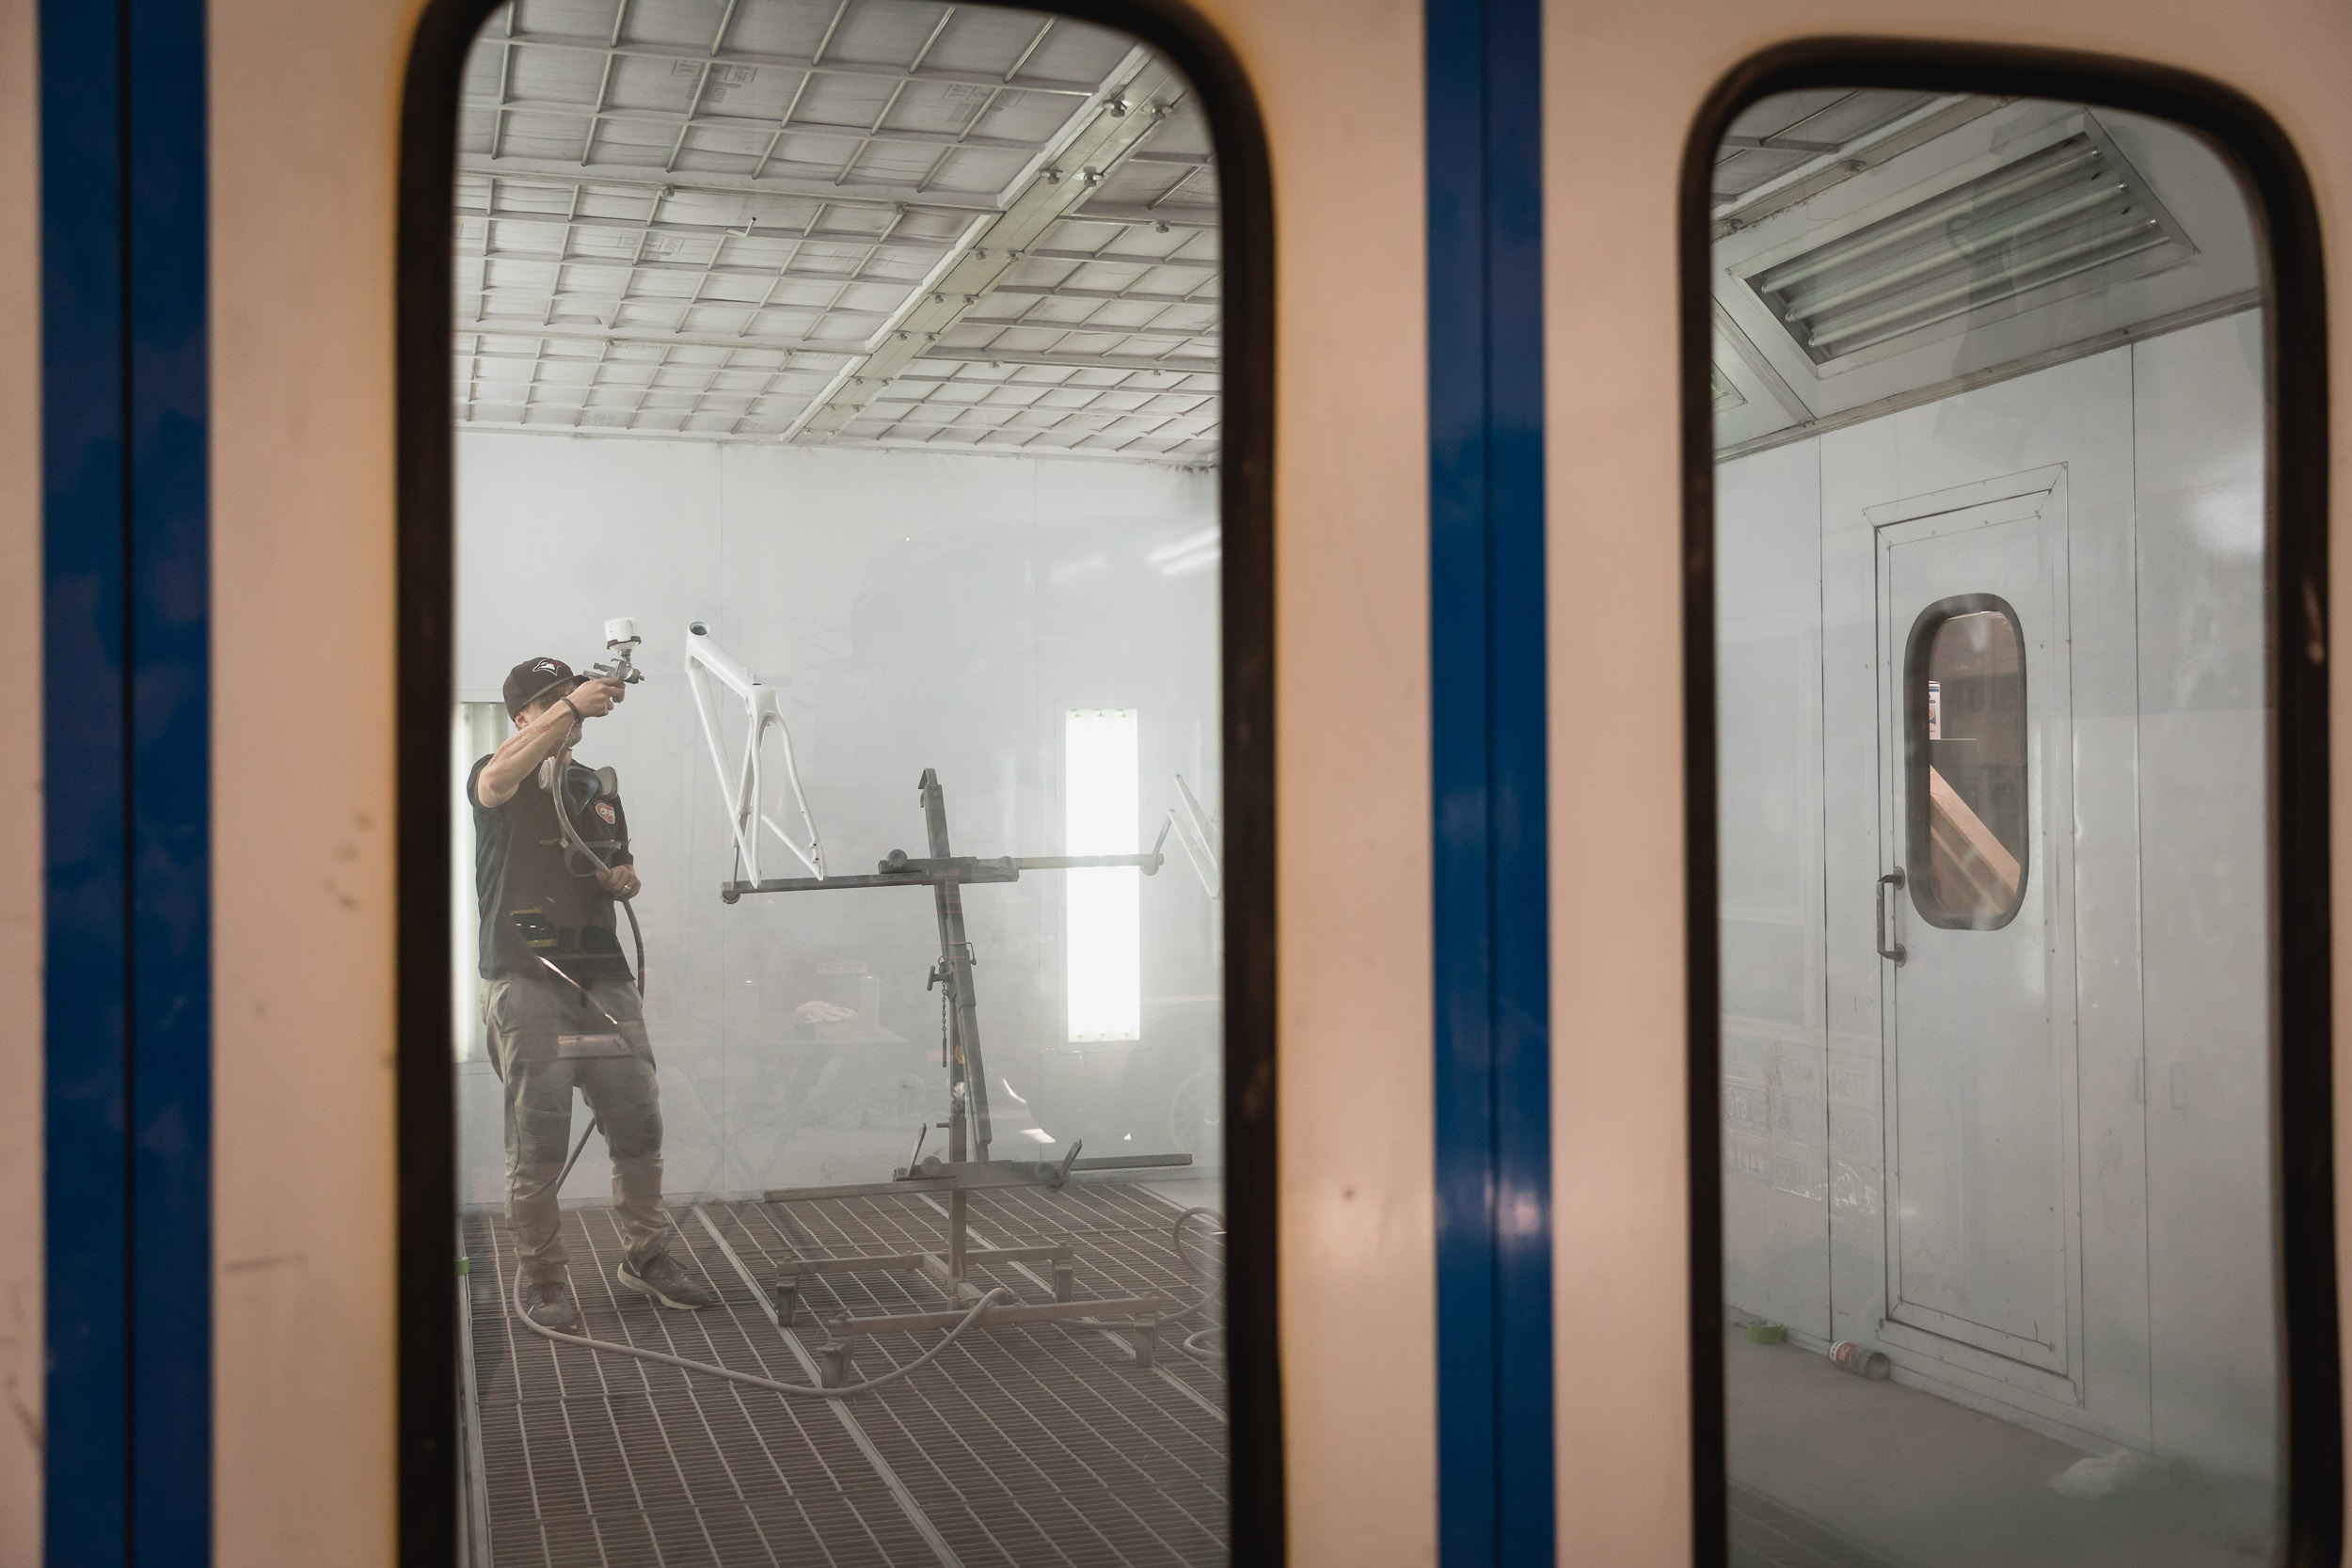
The next preconceived idea I had, was that all logos or details are masked off and painted on, but Matt wanted to apply the logos and graphics as decals over the paint, then clear coat over them. I saw him out and sited what this might have looked like, but pushed back and worked with him to mask off and paint them on instead, as the decal method looked cheap, and created a lip around the edges of the decals. Now, I’m not saying this is wrong or bad, it just wasn’t what we wanted.
Liam had ideas on what he wanted for the fork, those being: “something retro”; “digital zebra”; and “of an old Santa Cruz skateboard deck styling”. At this point, I was off shooting something else, so Liam and Matt were left to flesh out their ideas. I later learned that Matt had some difficulty masking up the fork in a zebra type manner, so used his artistic discretion and ran with what he could think up. What he came up with is what we now have; this brilliant blend of stripes and curves, that create an almost typo-map look.
However, this wasn’t Matt’s first go at the fork. He’d masked and painted it up the first time around, when disaster struck while he was baking the clear coat. To this day, no one knows how it happened but, during the baking, the clear coat bubbled and ruined all of Matt’s work. Rather than making do, Matt stripped the fork right back and started again. Second time lucky, and now with a tall tale to boot.
The Bike
Now in its third-generation, the Santa Cruz Stigmata has thrown its arms around the gravel scene. The first few iterations of this steed had more cyclocross intentions, but that’s not to say it didn’t make a good gravel bike. The latest iteration of the Stigmata, however, is unapologetically a gravel bike.
The previous generations had used aluminium, but this current generation employs carbon fibre for its frame material. The tyre clearance has been increased since the previous generation too. In order to get yourself a little more comfortable on those longer days, the fit moves into a relaxed realm with a taller stack and shorter reach along with a softened ride quality.
Up front, the Stigmata hasn’t employed any major changes from its previous generations. The handling is pretty good for the most part and does its job. But it’s not as progressive as some of the modern gravel bikes on the market.
This bike has been used on and off for the past year by me and a few of my buddies. The bike has good all-round ride quality and remains a staple in my garage. As mentioned, the bike has been thrown under several of my buddies – most of whom have been pedalling for a while. They’ve all enjoyed the bike, rating its ride quality and handling. Bear in mind, these buddies have taken it on multi-day mixed terrain trips without riding the bike beforehand, which gives it serious kudos.
The Groupset/First Impressions
As the market yearns for more adventure, the equipment – and more importantly, the gearing – needs to be en-point. Over my past few exploration rides, I’ve constantly found myself a little under-geared and seem to always be searching for just one gear easier.
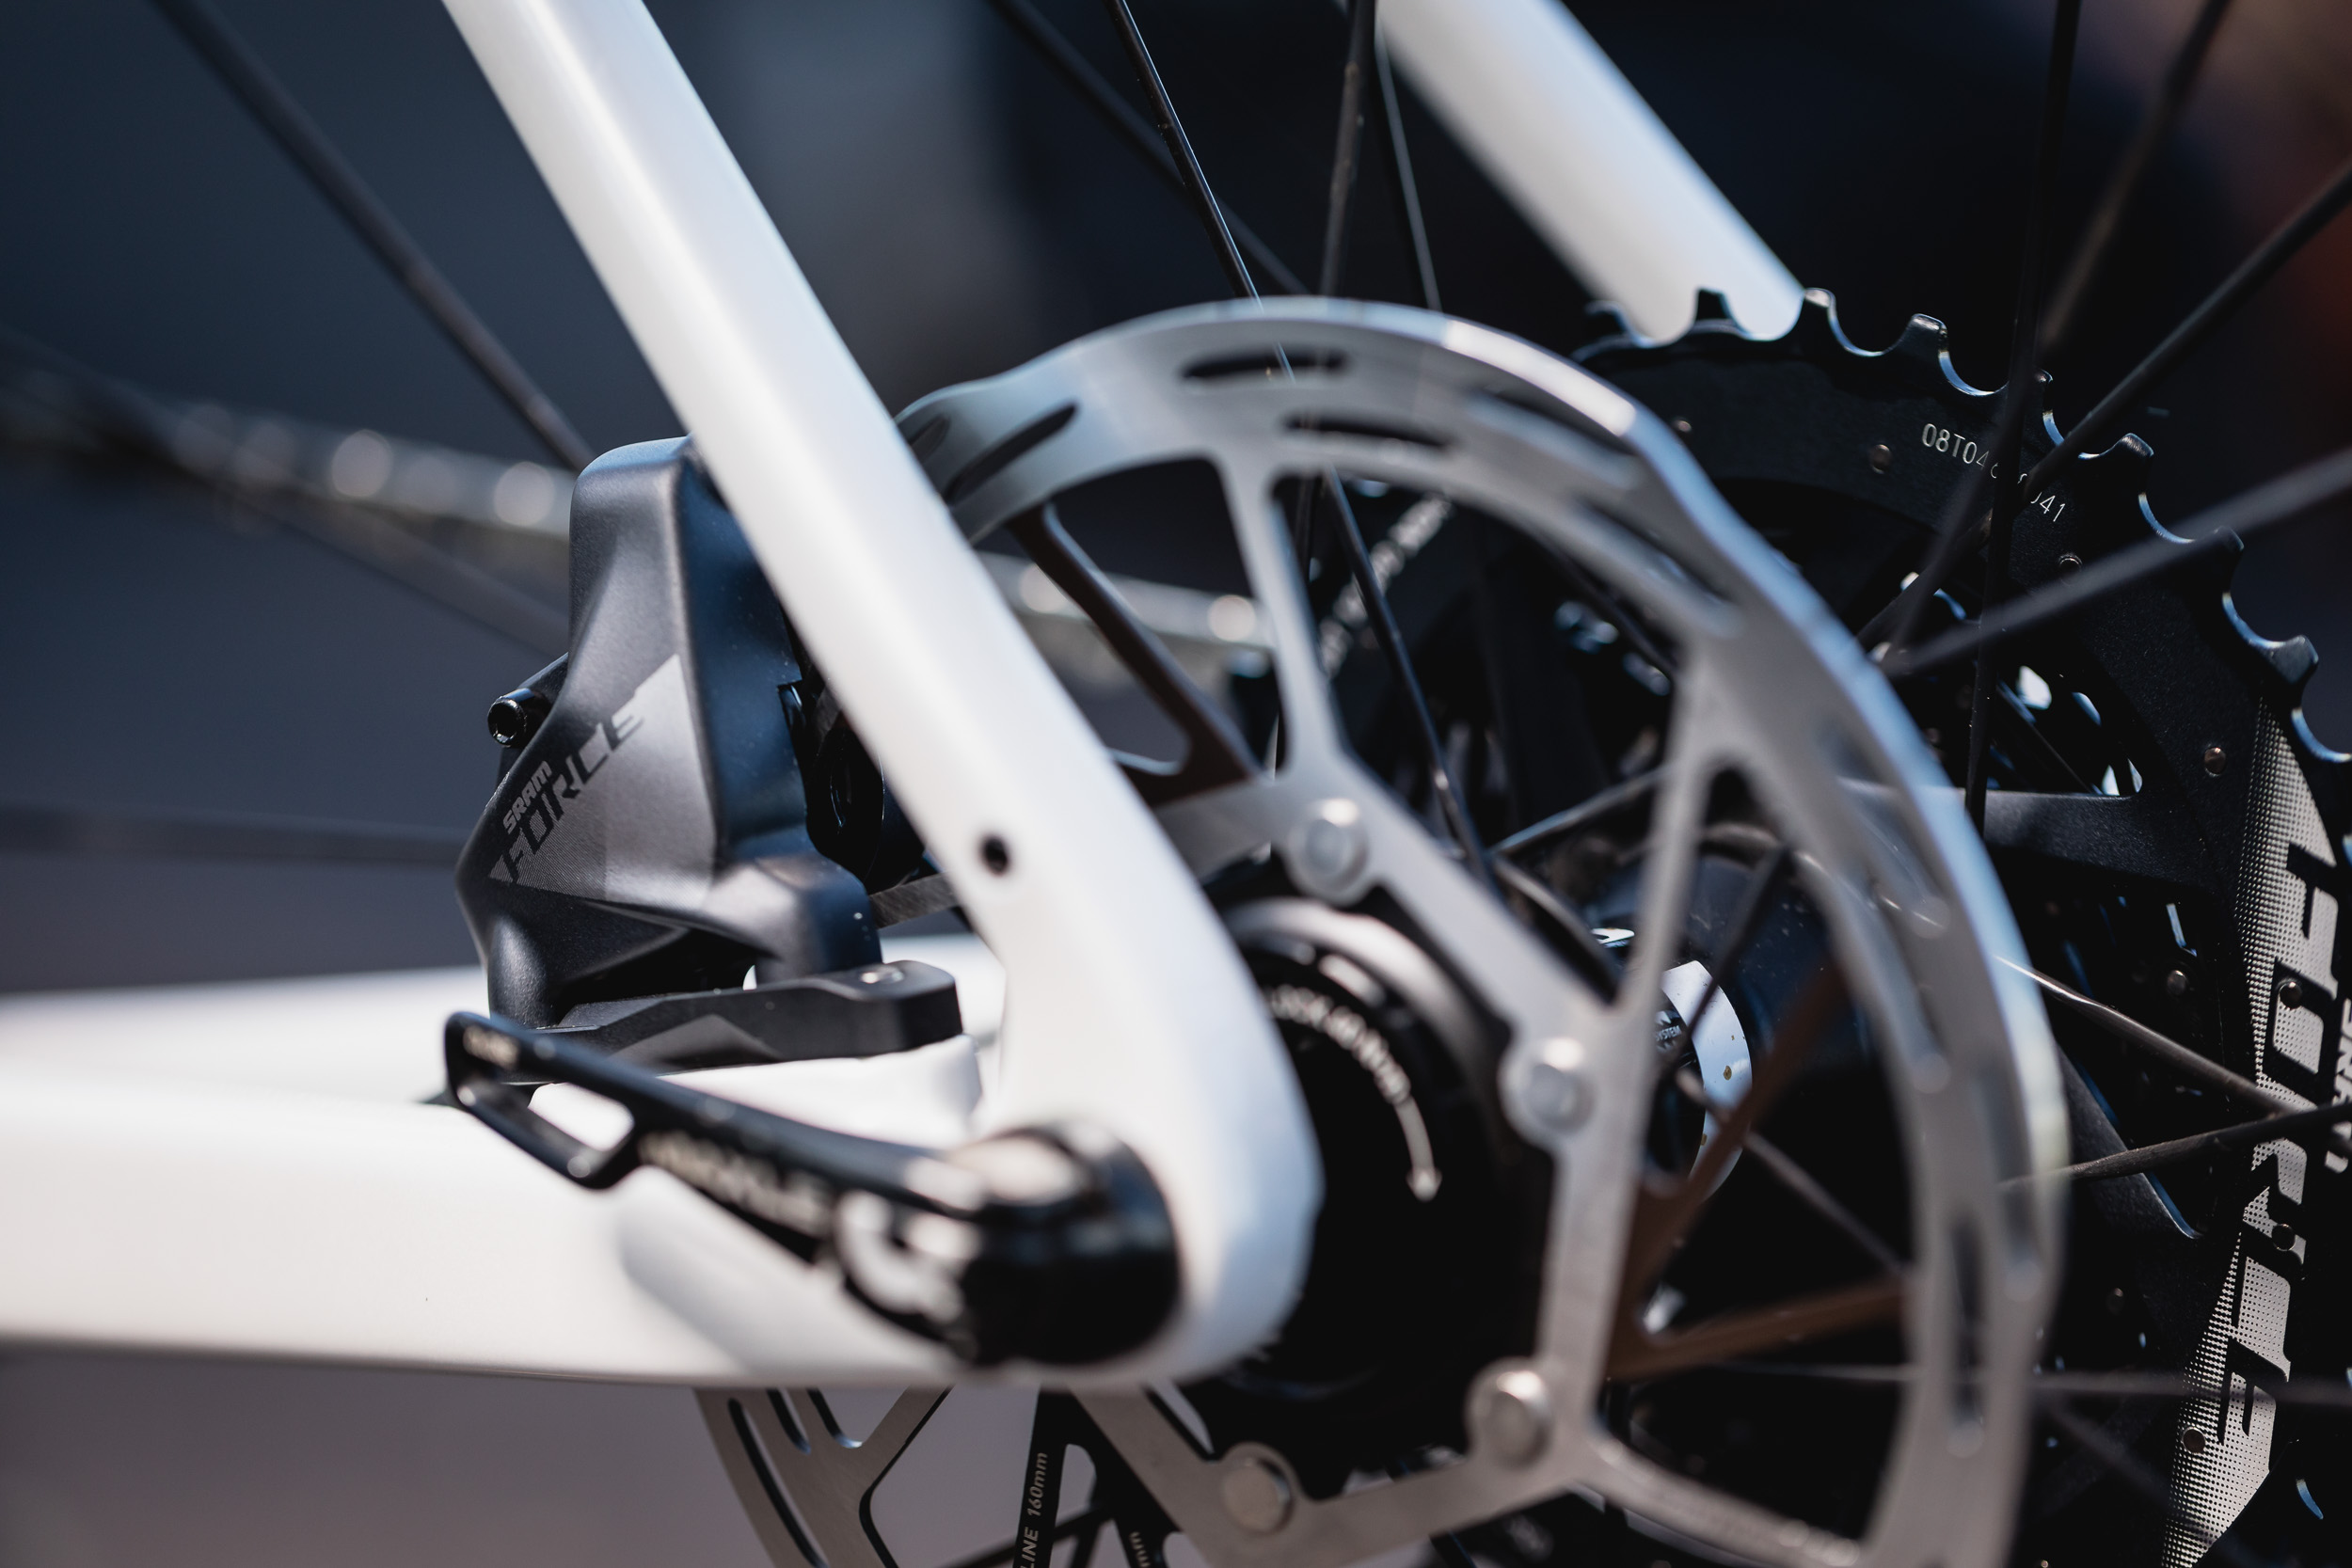
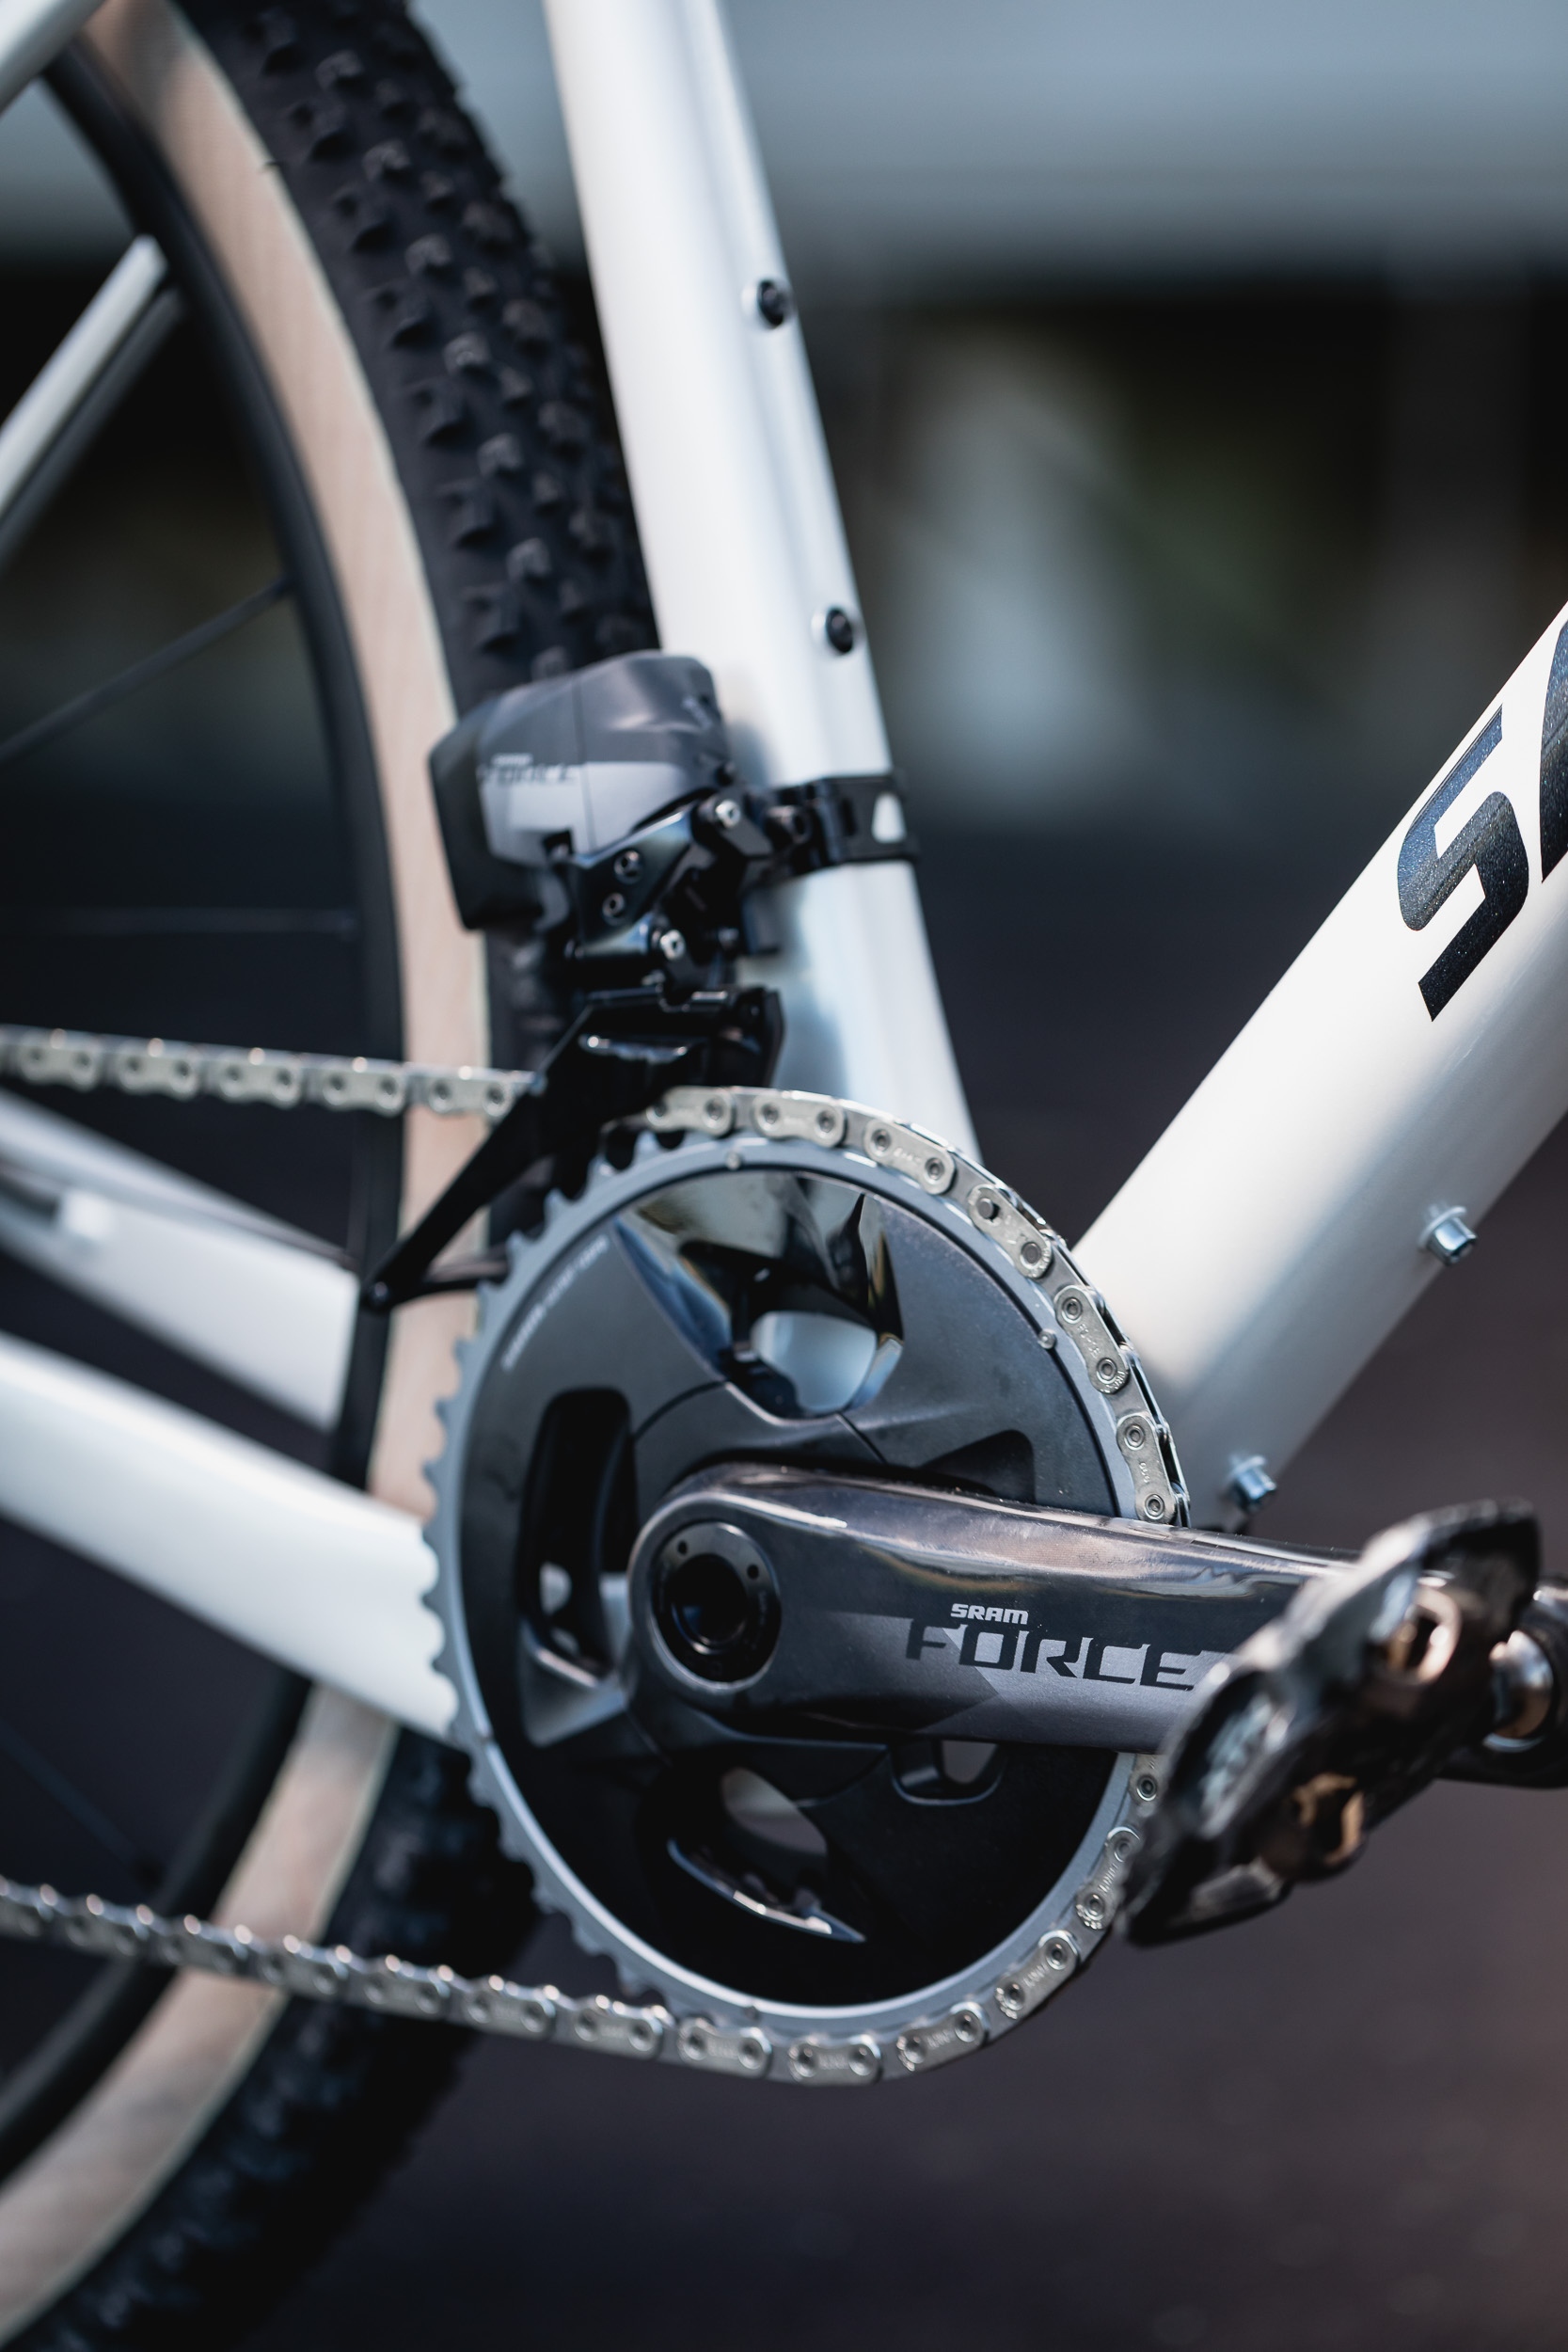
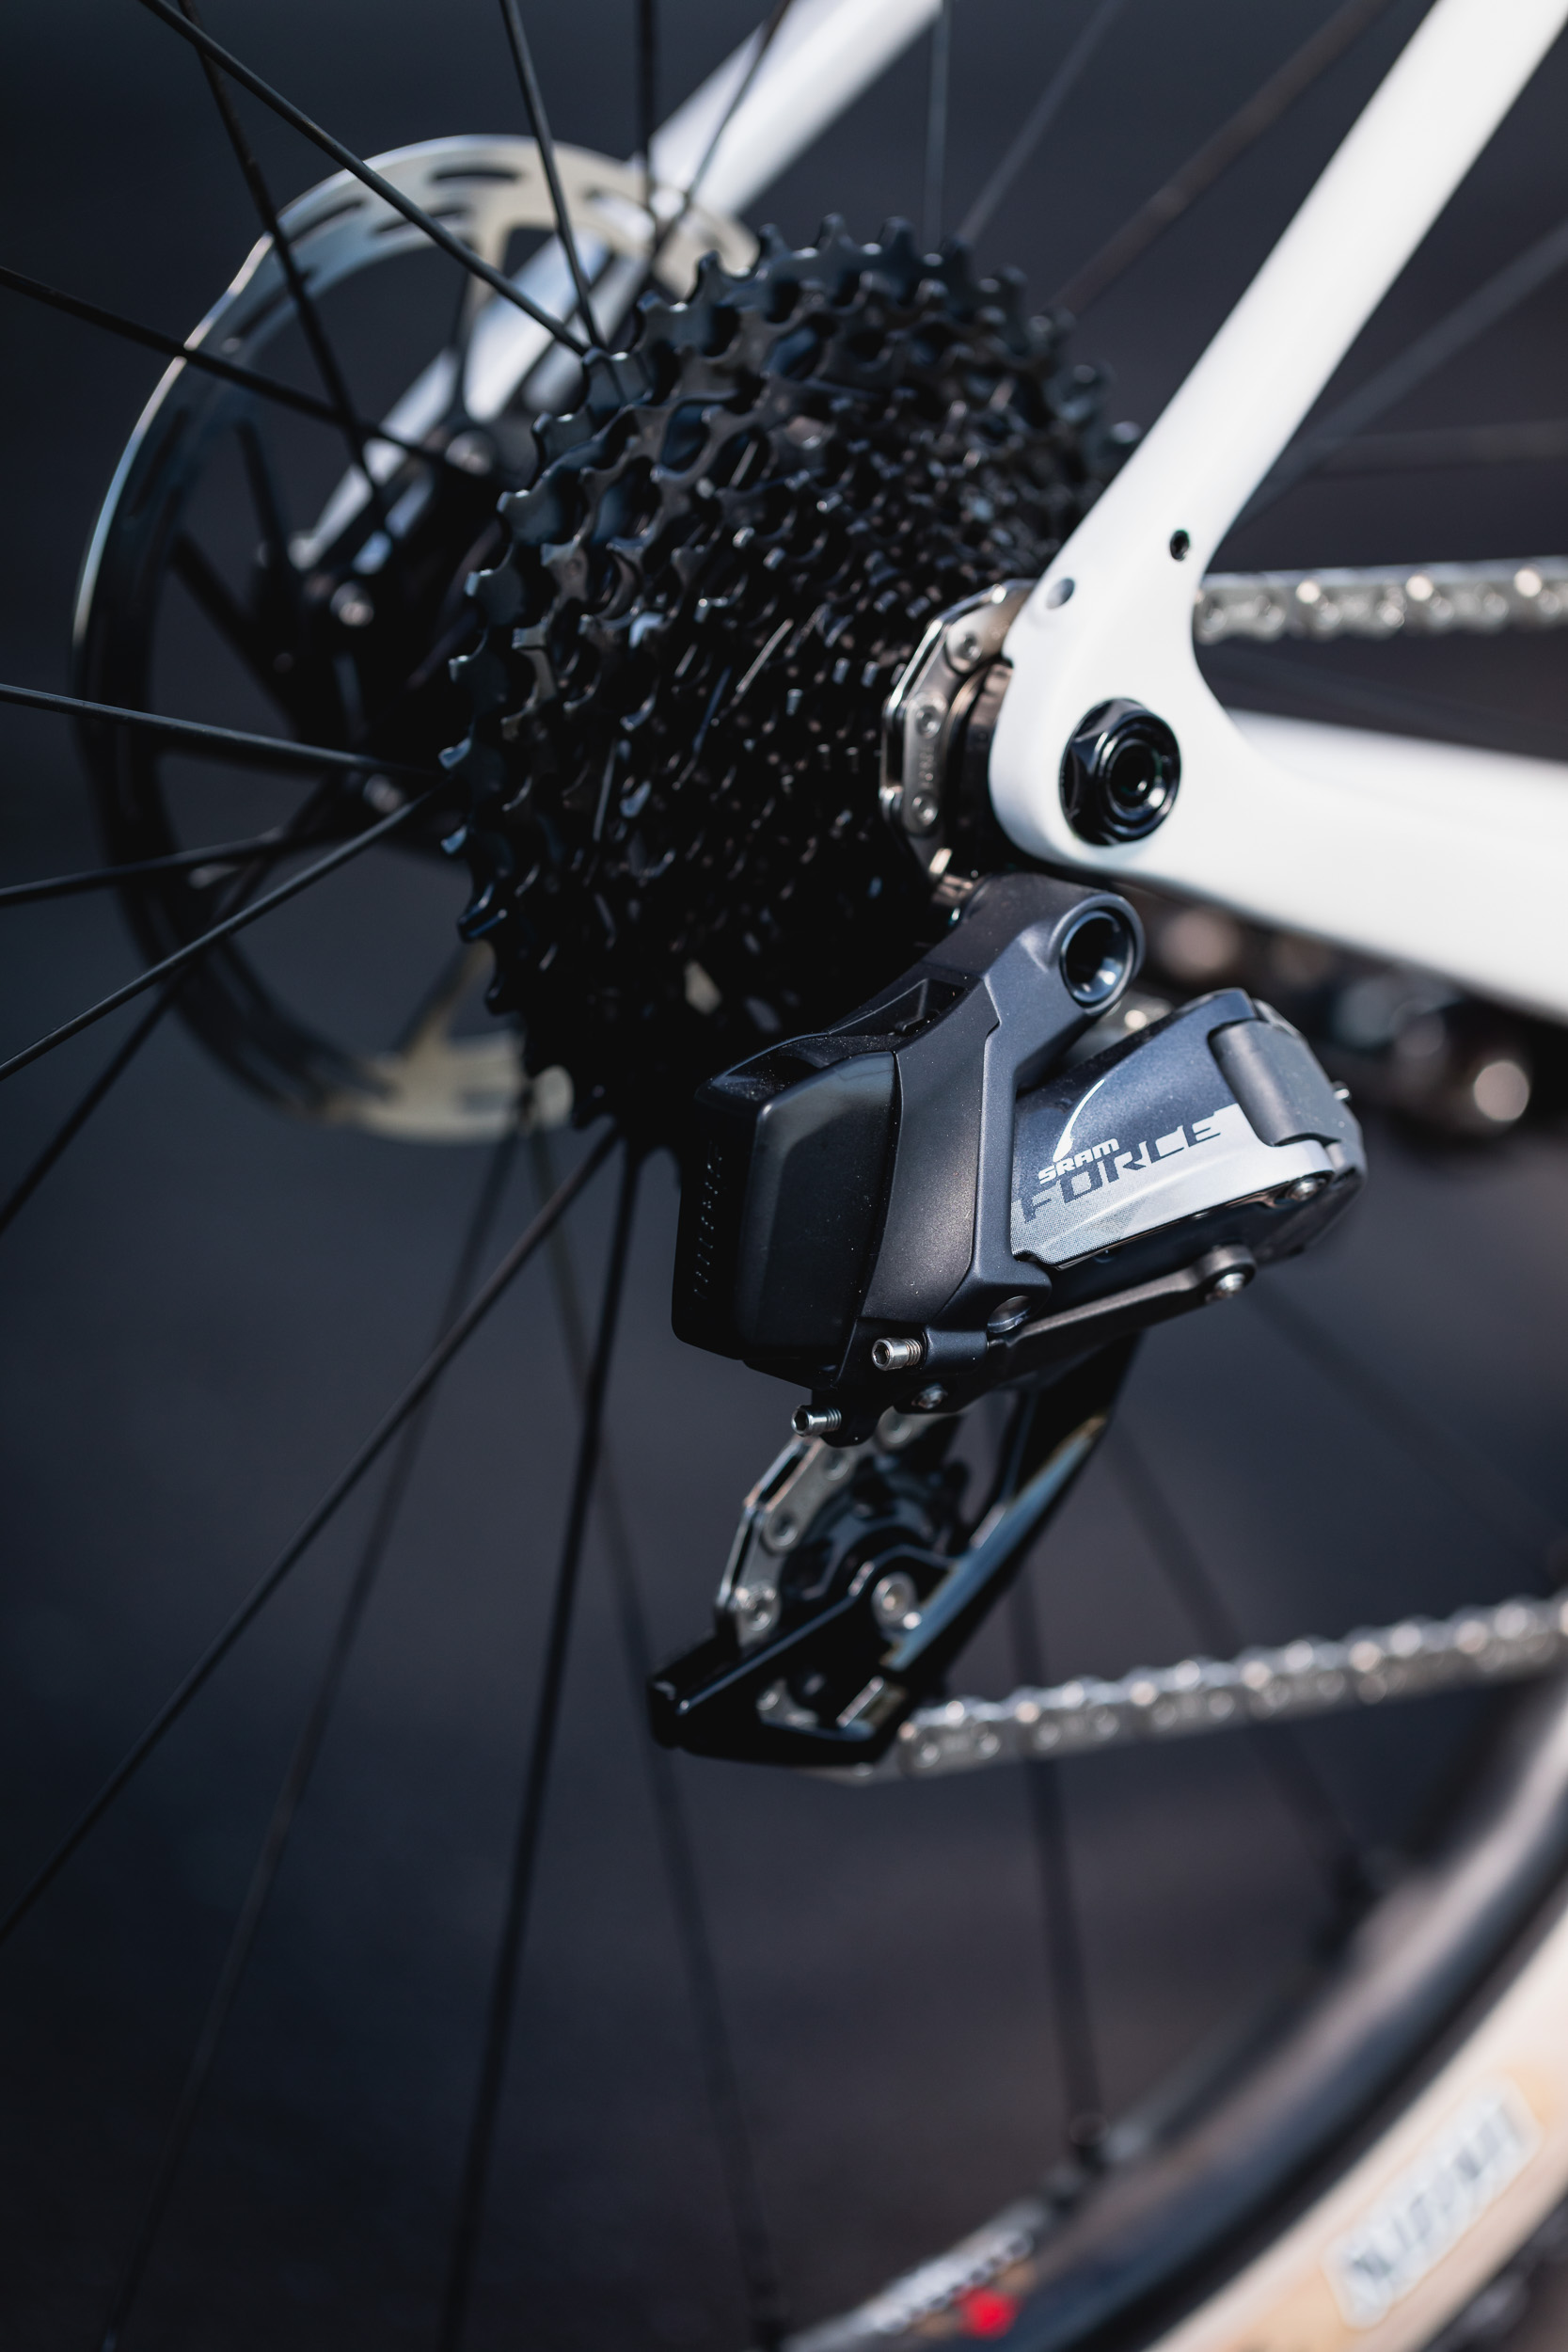
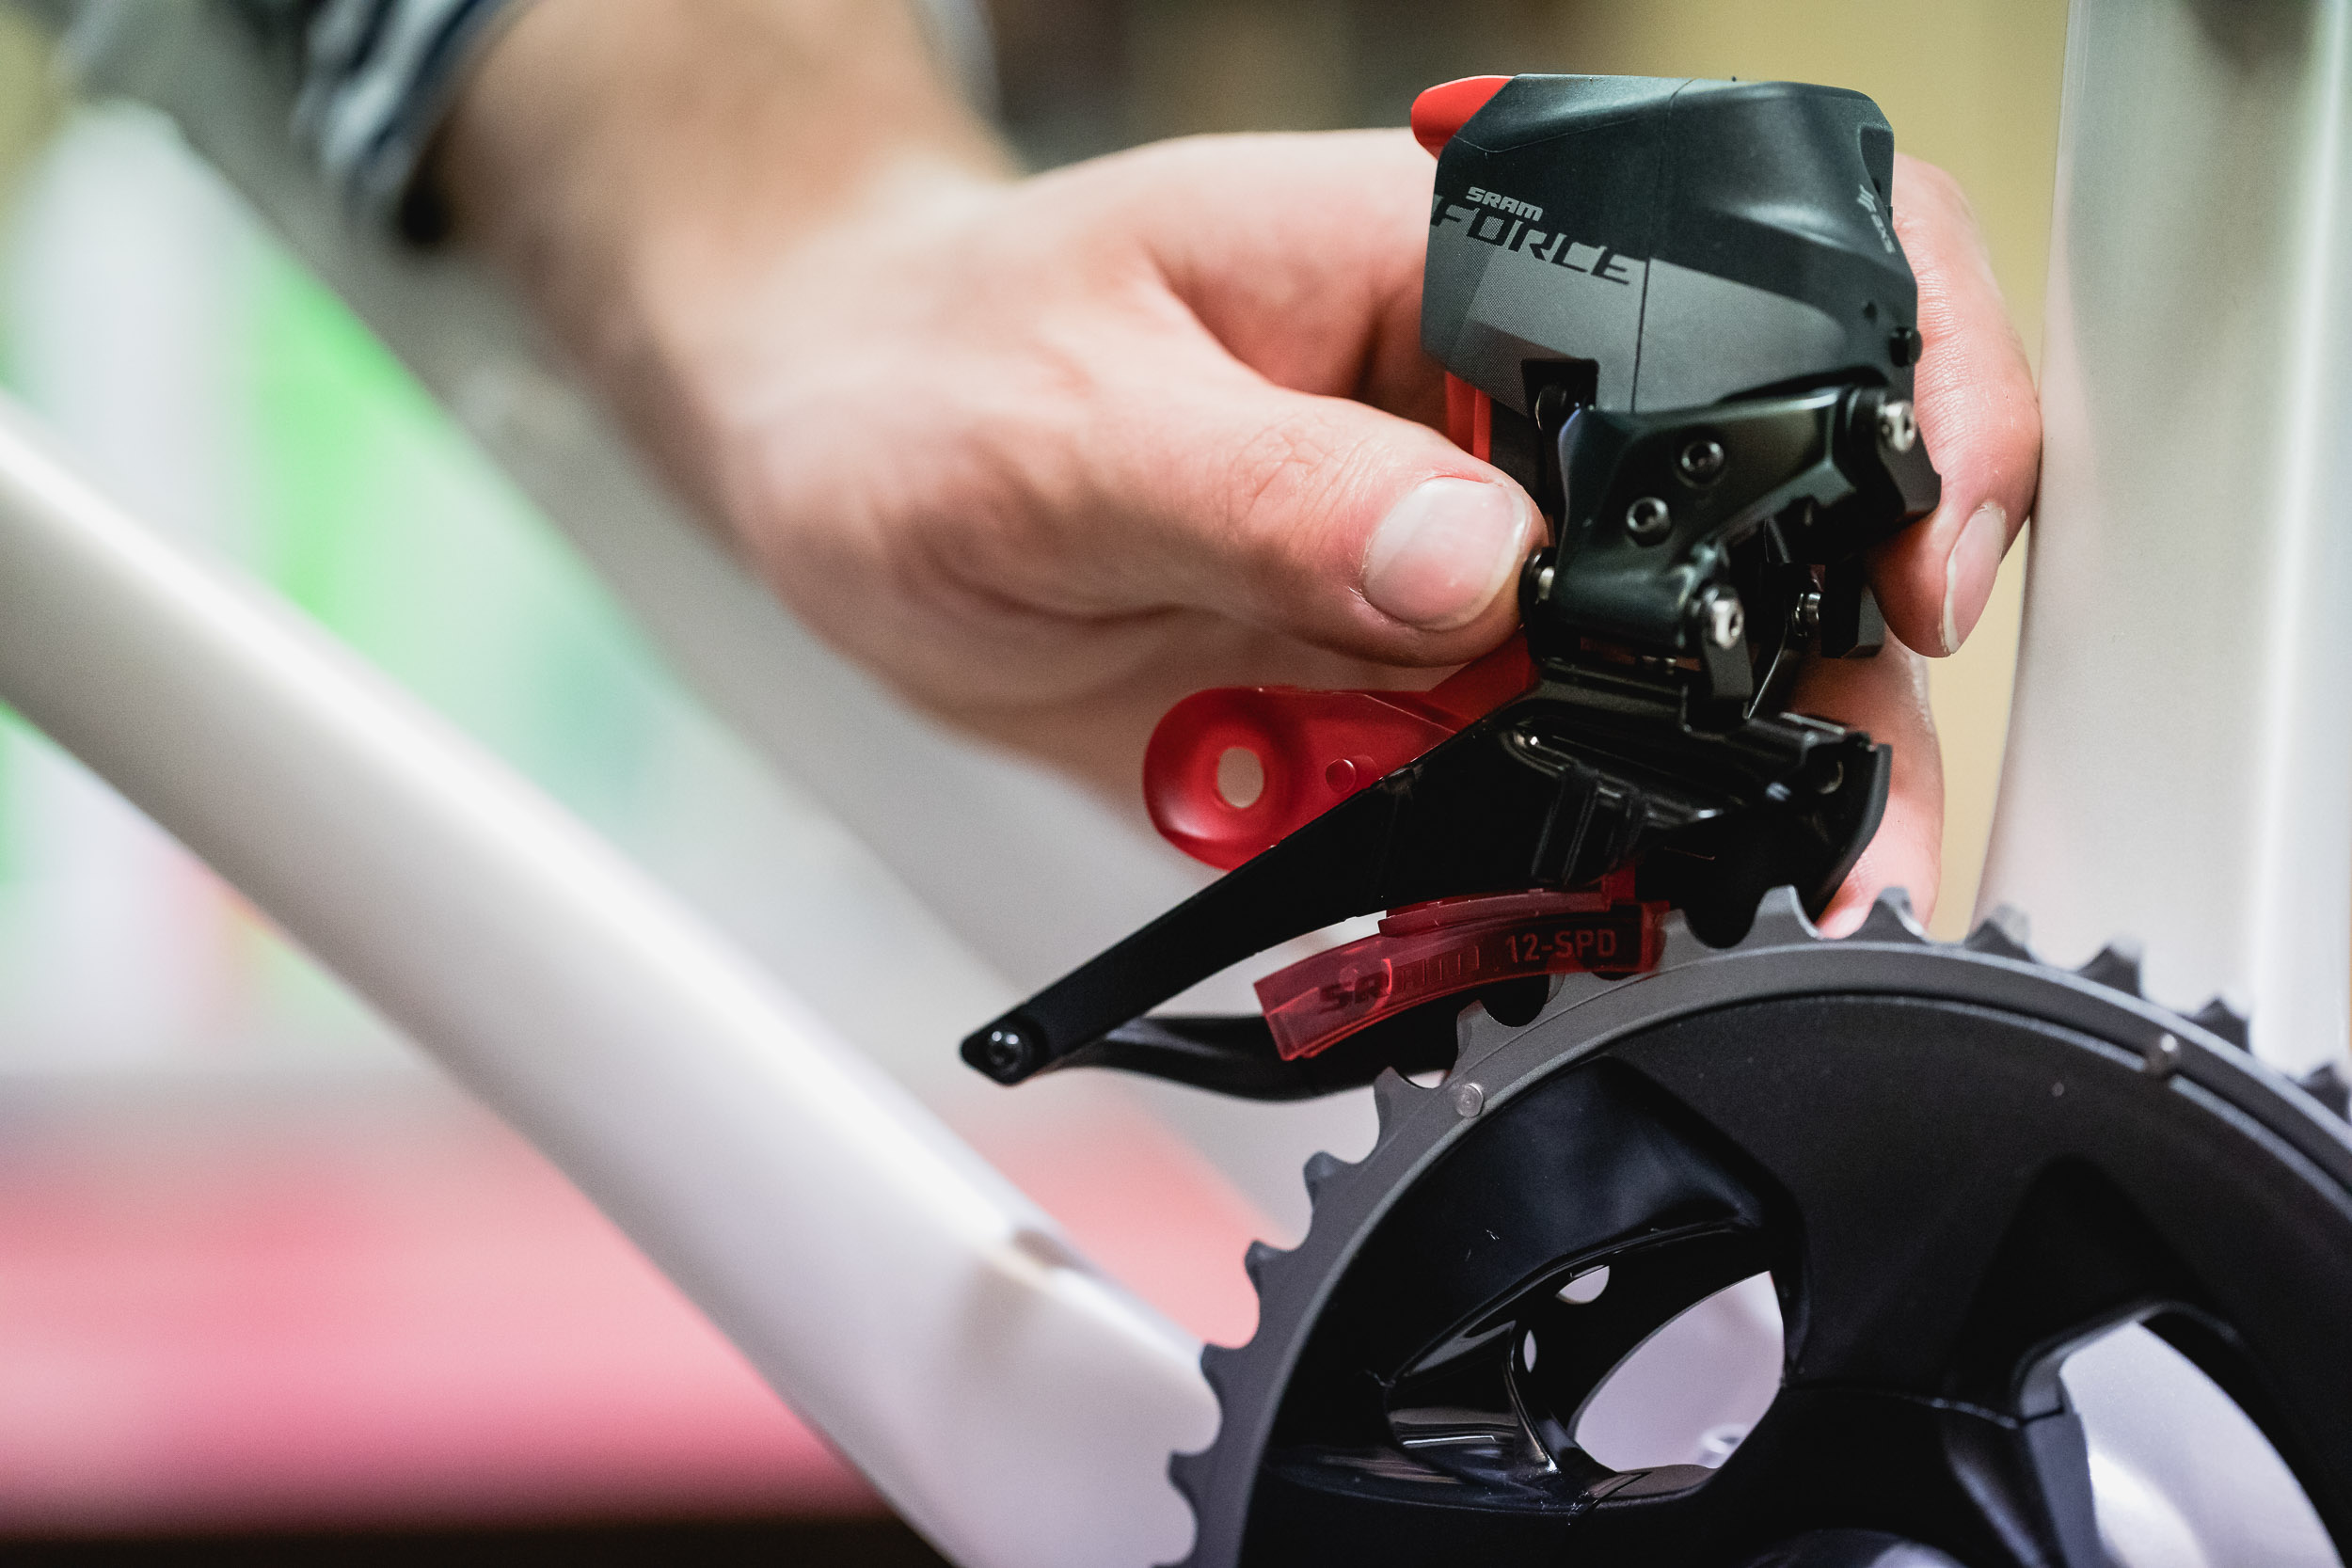
The new SRAM Force AXS Wide groupset offers a super-compact 43/30 chainring combo for either hilly terrain, gravel riding or laden bikepacking adventure bikes. Out the back is a wide range 10-36 cassette that’ll ensure you can get up any steep ascent.
Just after the launch, we received a package from SRAM. Thankfully, our Zoom conferences have been paying off over the lockdown! We were pretty excited about testing this new groupset on home soil. We fitted the new SRAM Force AXS Wide groupset onto our Santa Cruz Stigmata, and fitted Maxxis IKON 650 x 2.2’s. In more recent months, we have fitted the Panaracer Gravel King SK’s 650b x 53.
When I first received the new groupset, I went out on a few mixed terrain rides. These are mainly in and around my local area, which is made up of roads, access ways and gravel tracks. Initially, the gearing felt good and there’s an ease of changing between gears. SRAM’s electronic shifting has always been en-point. It’s strong, powerful, and quick.
SRAM’s rear shifting delivered too, especially when shifting under pressure; swift and responsive. The Orbit hydraulic “clutch” chain management system works like a treat, too. Not long out my door is a steep ascent, it pinches around 10%. The large volume of the tyres, coupled with a steep ascent, made me shift down to the lowest gear on the rear cassette available. What was noticeable with the new groupset, was that the cadence had increased and I wasn’t even in the 36?!
I tackled some rougher terrain next – this is a gravel track that runs through some lush native bush. As I sped past the ferns, the gearing felt fluid and my cadence turnover was quick. The shifts on the block were tighter, there weren’t any great leaps when I shifted from one cog to another. This is down to the grouping of the rear gears, there are more single tooth jumps towards the smaller sprockets, with the big jumps appearing at the other end on the larger sprockets, needed for climbing. I tackled steep, loose gravel descents and ascents on this initial ride. The climbs are short, sharp and quite hard, over loose rocky terrain. Having the 30/36 combination was welcomed. I often struggle on this climb and generally grind to a halt. However, on this occasion, I could get on top of the gear and turn the pedals over much easier.
The Parts
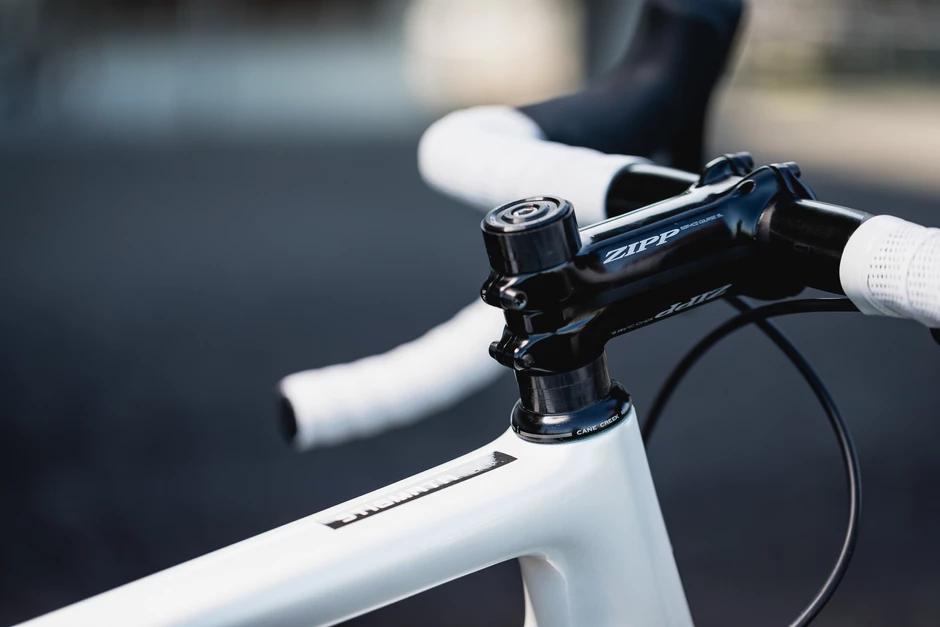
Cockpit – Zipp’s Service Course SL components have been nicely smattered across the bike. I needed slightly more length so opted for Zipp Service Course SL 20mm set back seat post. The stem is Zipp Service Course SL 100m and is attached to the Zipp SL-70 XPLR Handlebars. I’ve had these handlebars on the Santa Cruz Stigmata for a while now. This rig is ridden quite a lot and is capable at riding any terrain thrown in front of it. So, it made for a good test for the 70 XPLR bars. Over the time I’ve had them, they’ve been super-comfy, and I really rate the shallow drop. I’ve noticed I get into the shallower drop of these bars more often, which has meant negotiating technical terrain better. And, subsequently tackling descents faster.
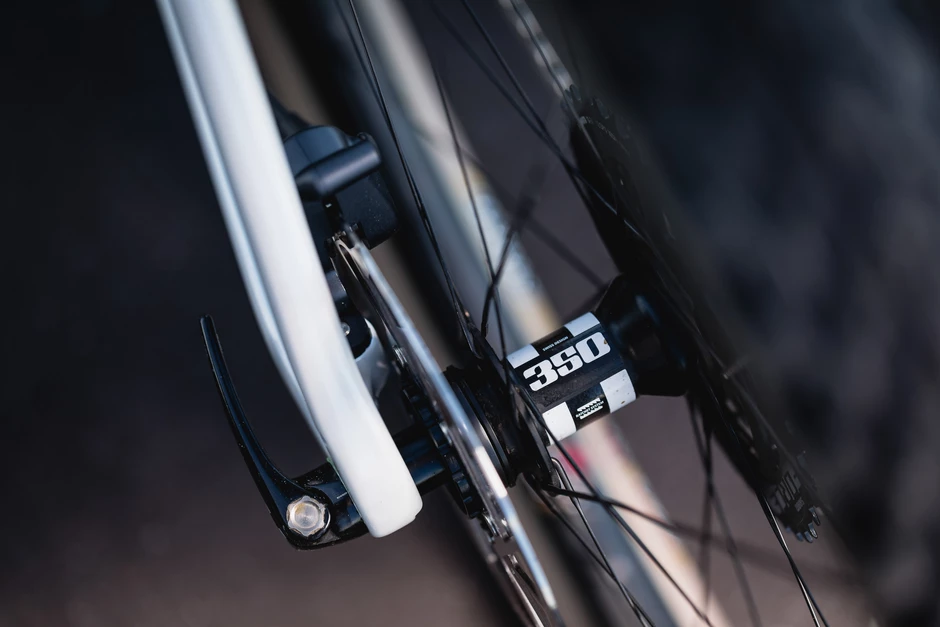
Wheels – Santa Cruz Reserve 25 Carbon 650b laced with DT 350 hubs. Damn these rims are fine; modern profiles, minimal branding, and a lifetime warranty. But the homies at Santa Cruz didn’t stop there; in order to reach a perfect compromise between stiffness and flex, the 25 mm deep rim has been utilised and connects to the hub via 24 Sapim CX-Ray bladed spokes. Unlike most other manufacturers, Santa Cruz placed their carbon reinforcements around the spokes on the outer side of the rim. This guarantees correct positioning and centred drilling of the hole, any sort of mistake would be immediately visible. The hookless design belies its mountain bike provenance, and J-bend spokes and external nipples make it ideal for long bikepacking expeditions when repair isn’t so much a matter of if but when.
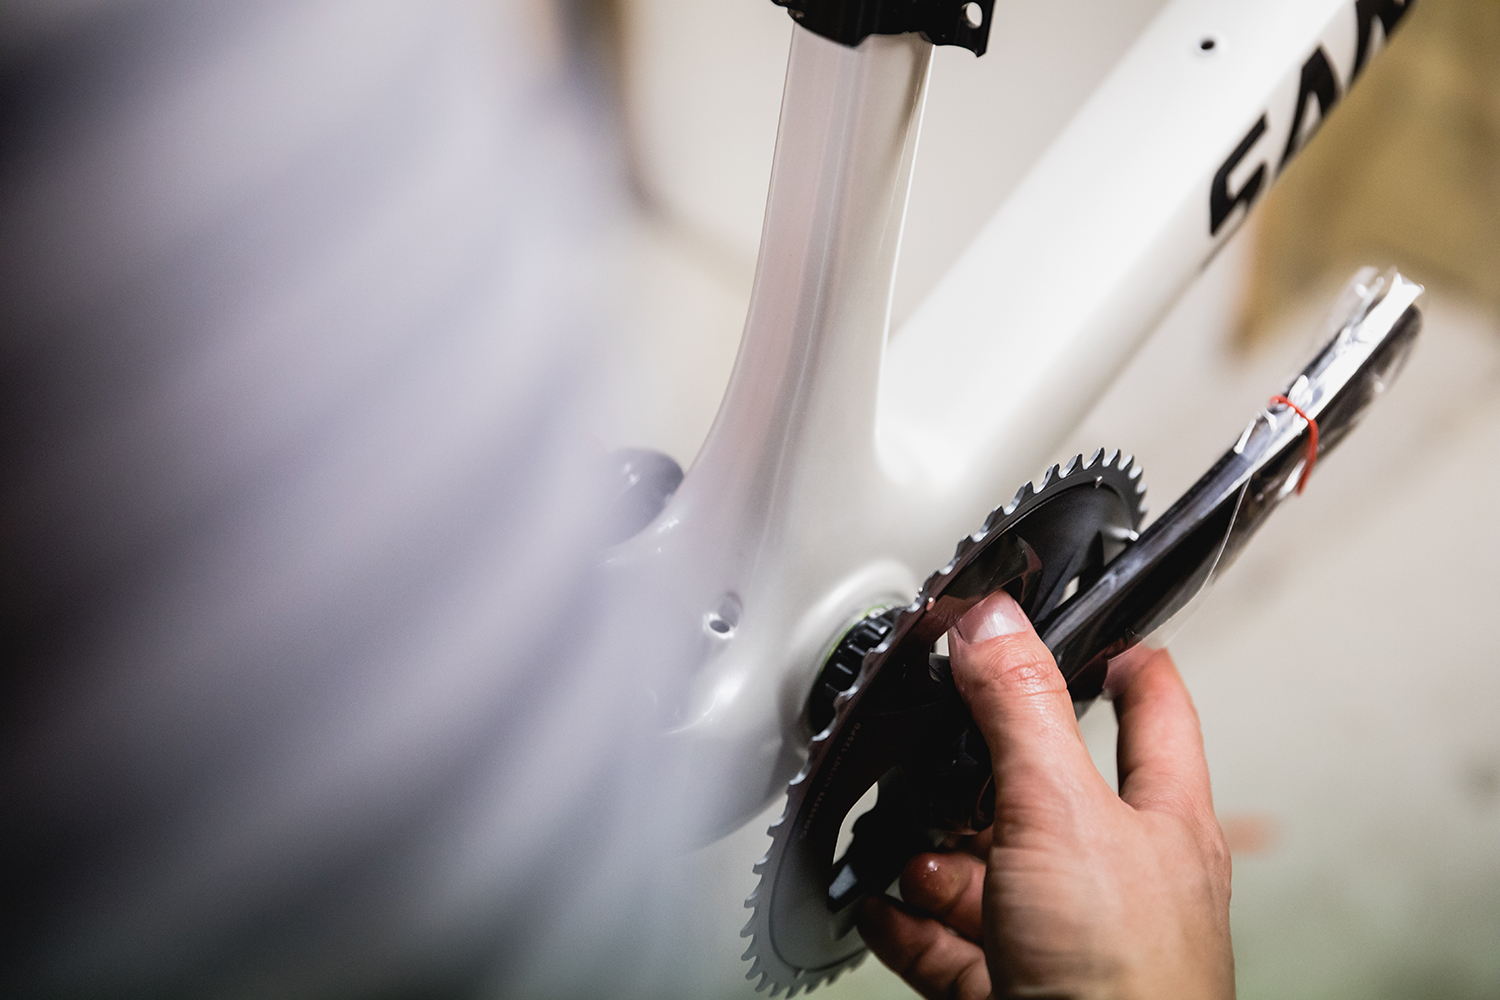
The Build (notes from our mechanic – Cameron Mackenzie)
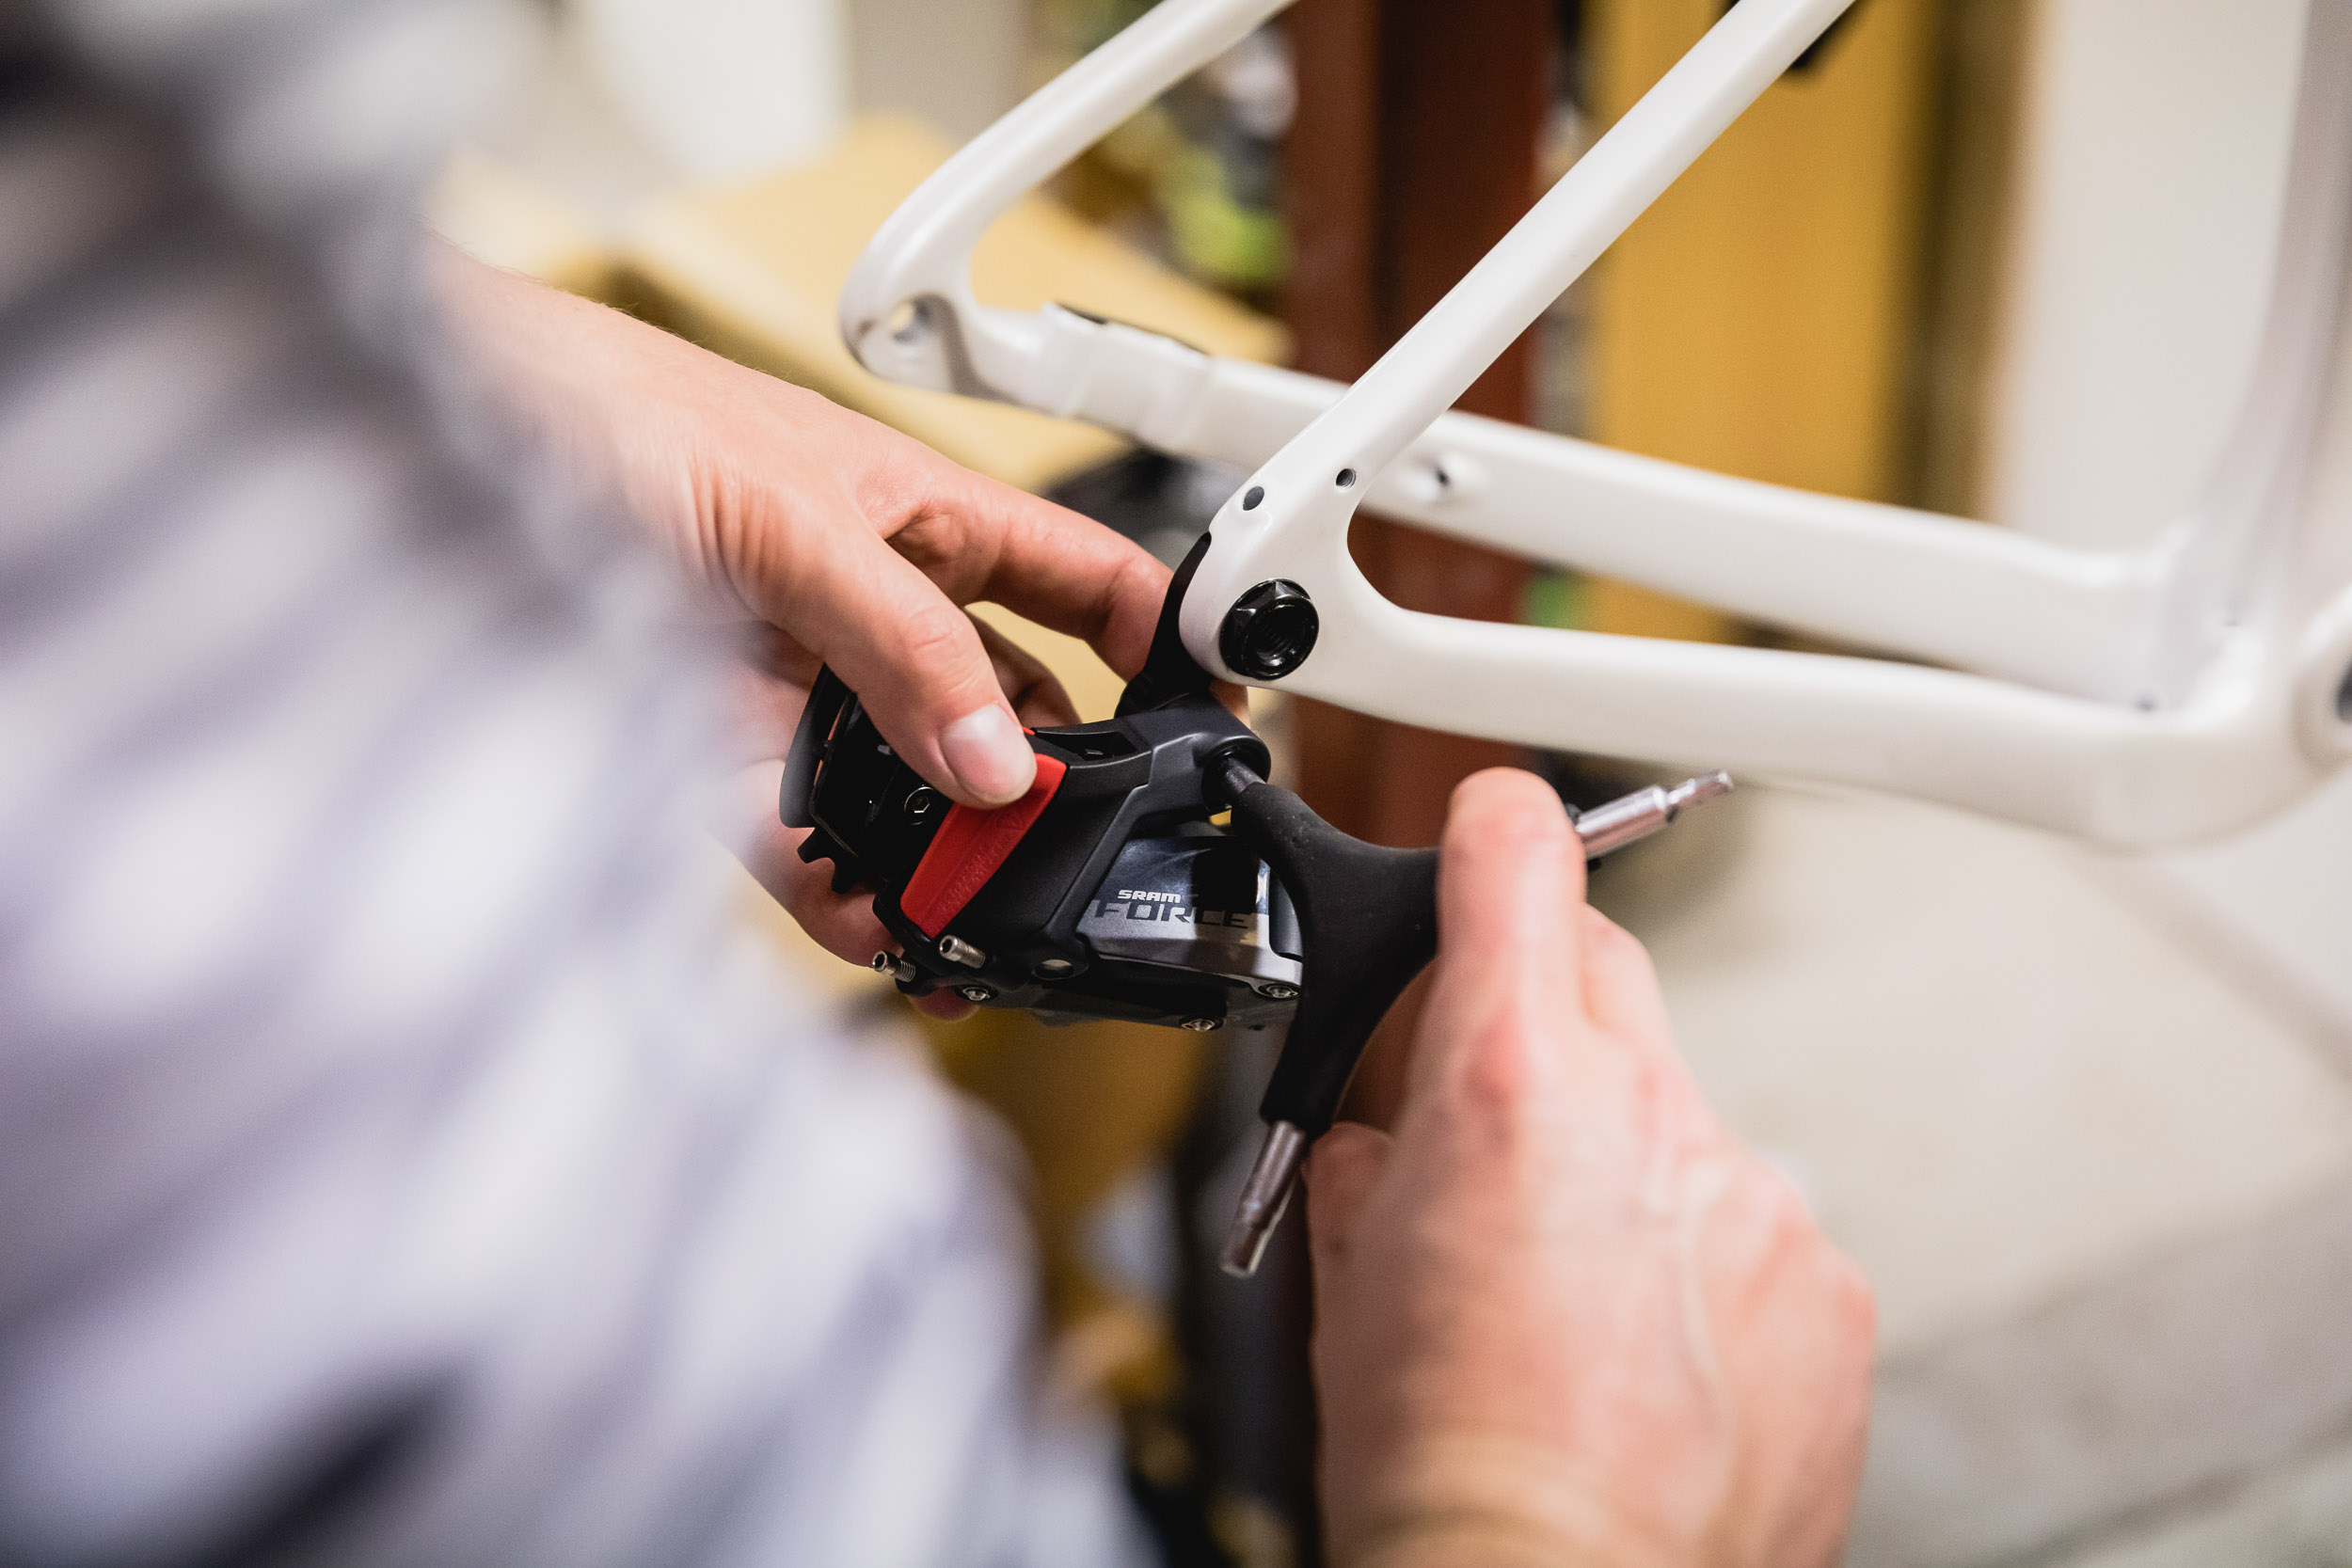
Having put together a few bikes already, with SRAM’s Force AXS, I knew I wasn’t in for any surprises there. The big question marks lay in how the frame would be to work with on its return.
Like all good things, nothing is ever straightforward and, sure enough, once I’d got the frame back from Matt and in the work stand, it was clear to see that care hadn’t been given to all the little things.
Several of the little threads around things like cable guides and grub screws hadn’t been filled in, and the thru-axle threads and surfaces hadn’t been masked. Any decent bike builder will tell you, the success of a good build lays in frame preparation. So, before any parts went on, I had to spend time cleaning up all these little issues. Extra care had to be taken around the axles holes, as chipping the paint here when trying to remove the overspray could cause larger chipping up the fork or frame. There’s no handbook on how to do things like this, so I devised a little solution involving wrapping fine sandpaper around a small piece of dowel, and popping that in a drill, creating a thin, round power-sander which worked a treat.
Working with AXS is always pleasurable, as it’s so easy to fit. For this build, we’d been supplied an early version of the new wide range Force, and I was surprised to find that SRAM included new setup guides for both the front and rear derailleurs – as opposed to just a rear guide. The beauty of these, is that they take the guess work out of aligning or positioning anything.
We are getting so used to seeing and working with 1x drivetrains now, that working with a front derailleur comes as a shock. While many would tell you that knowing how to tune a front mech is bike mechanics 101, everyone has their own set of tricks and not everyone does a good job. This new setup guide essentially does this job for us. All that’s required is placing the front derailleur with the guide installed on the large chainring, and bolting it up.
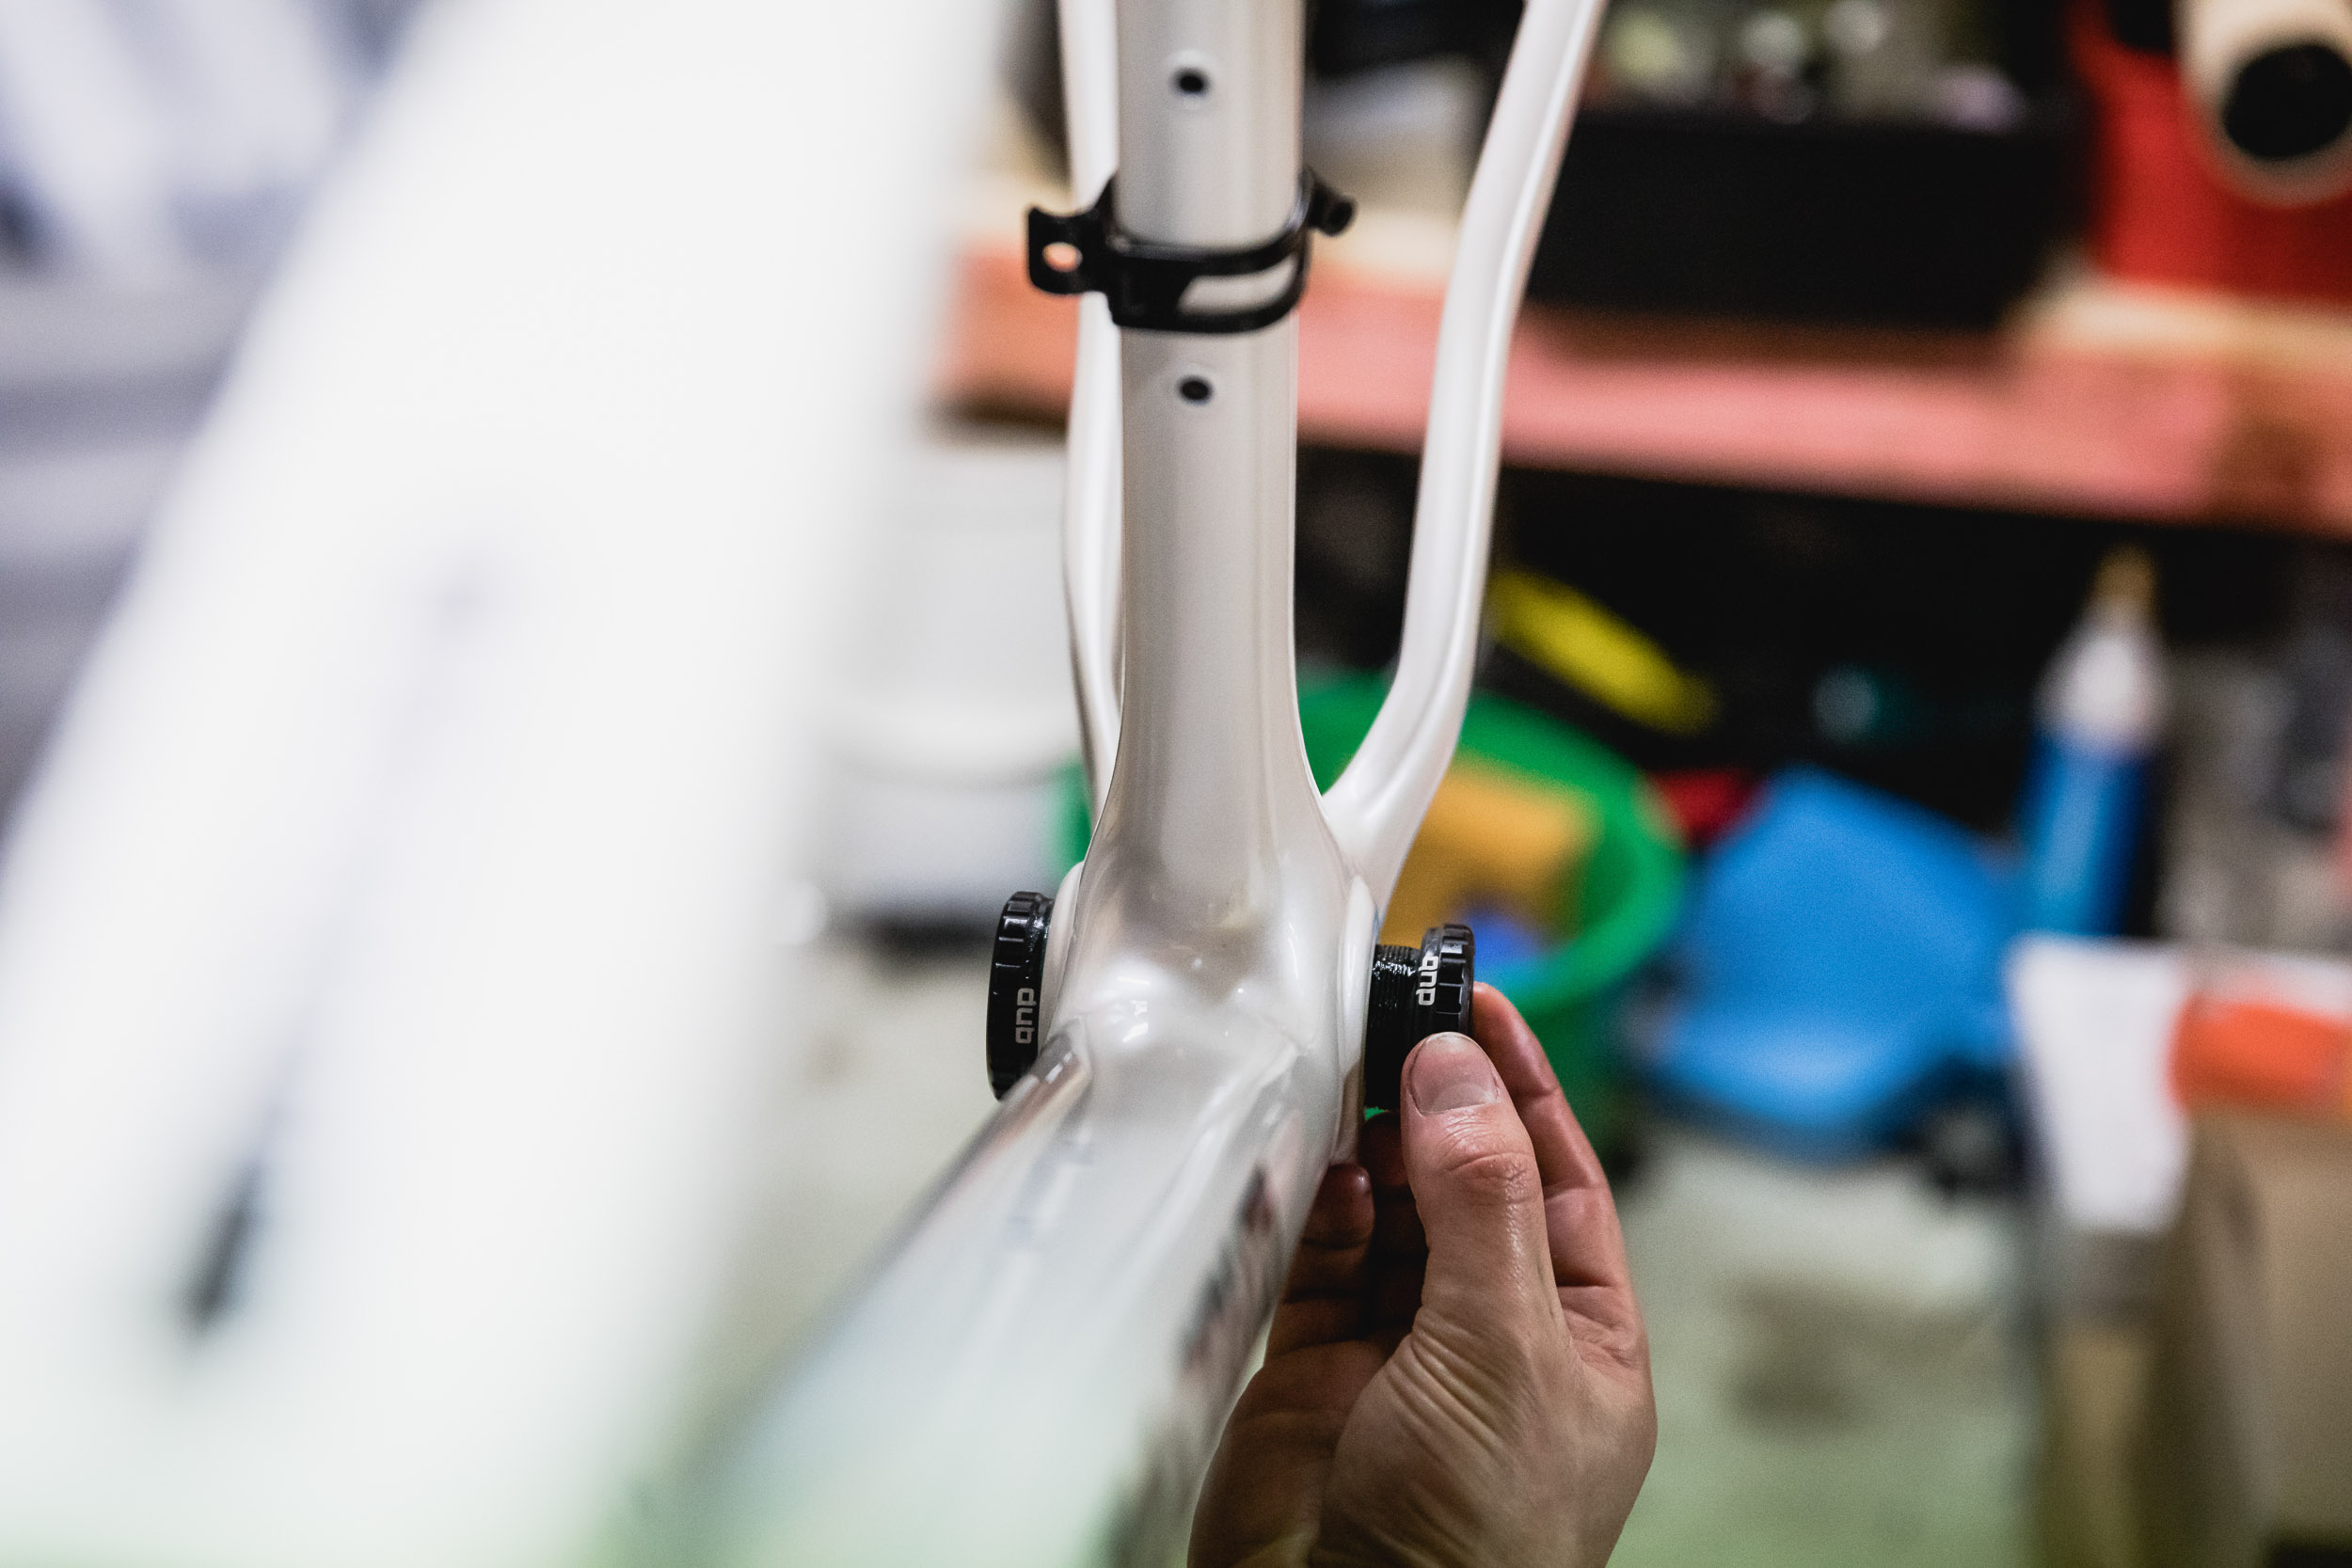
Swapping from a Shimano to SRAM groupset means you are crossing over several ‘standards’, so I had to be mindful of building it up as a new bike, rather than relying on previous spacings or configurations. The DUB BB is great example of this, and an area where I measure and check things to ensure the alignment, spacing and chainline is correct based on the crank we are working with.
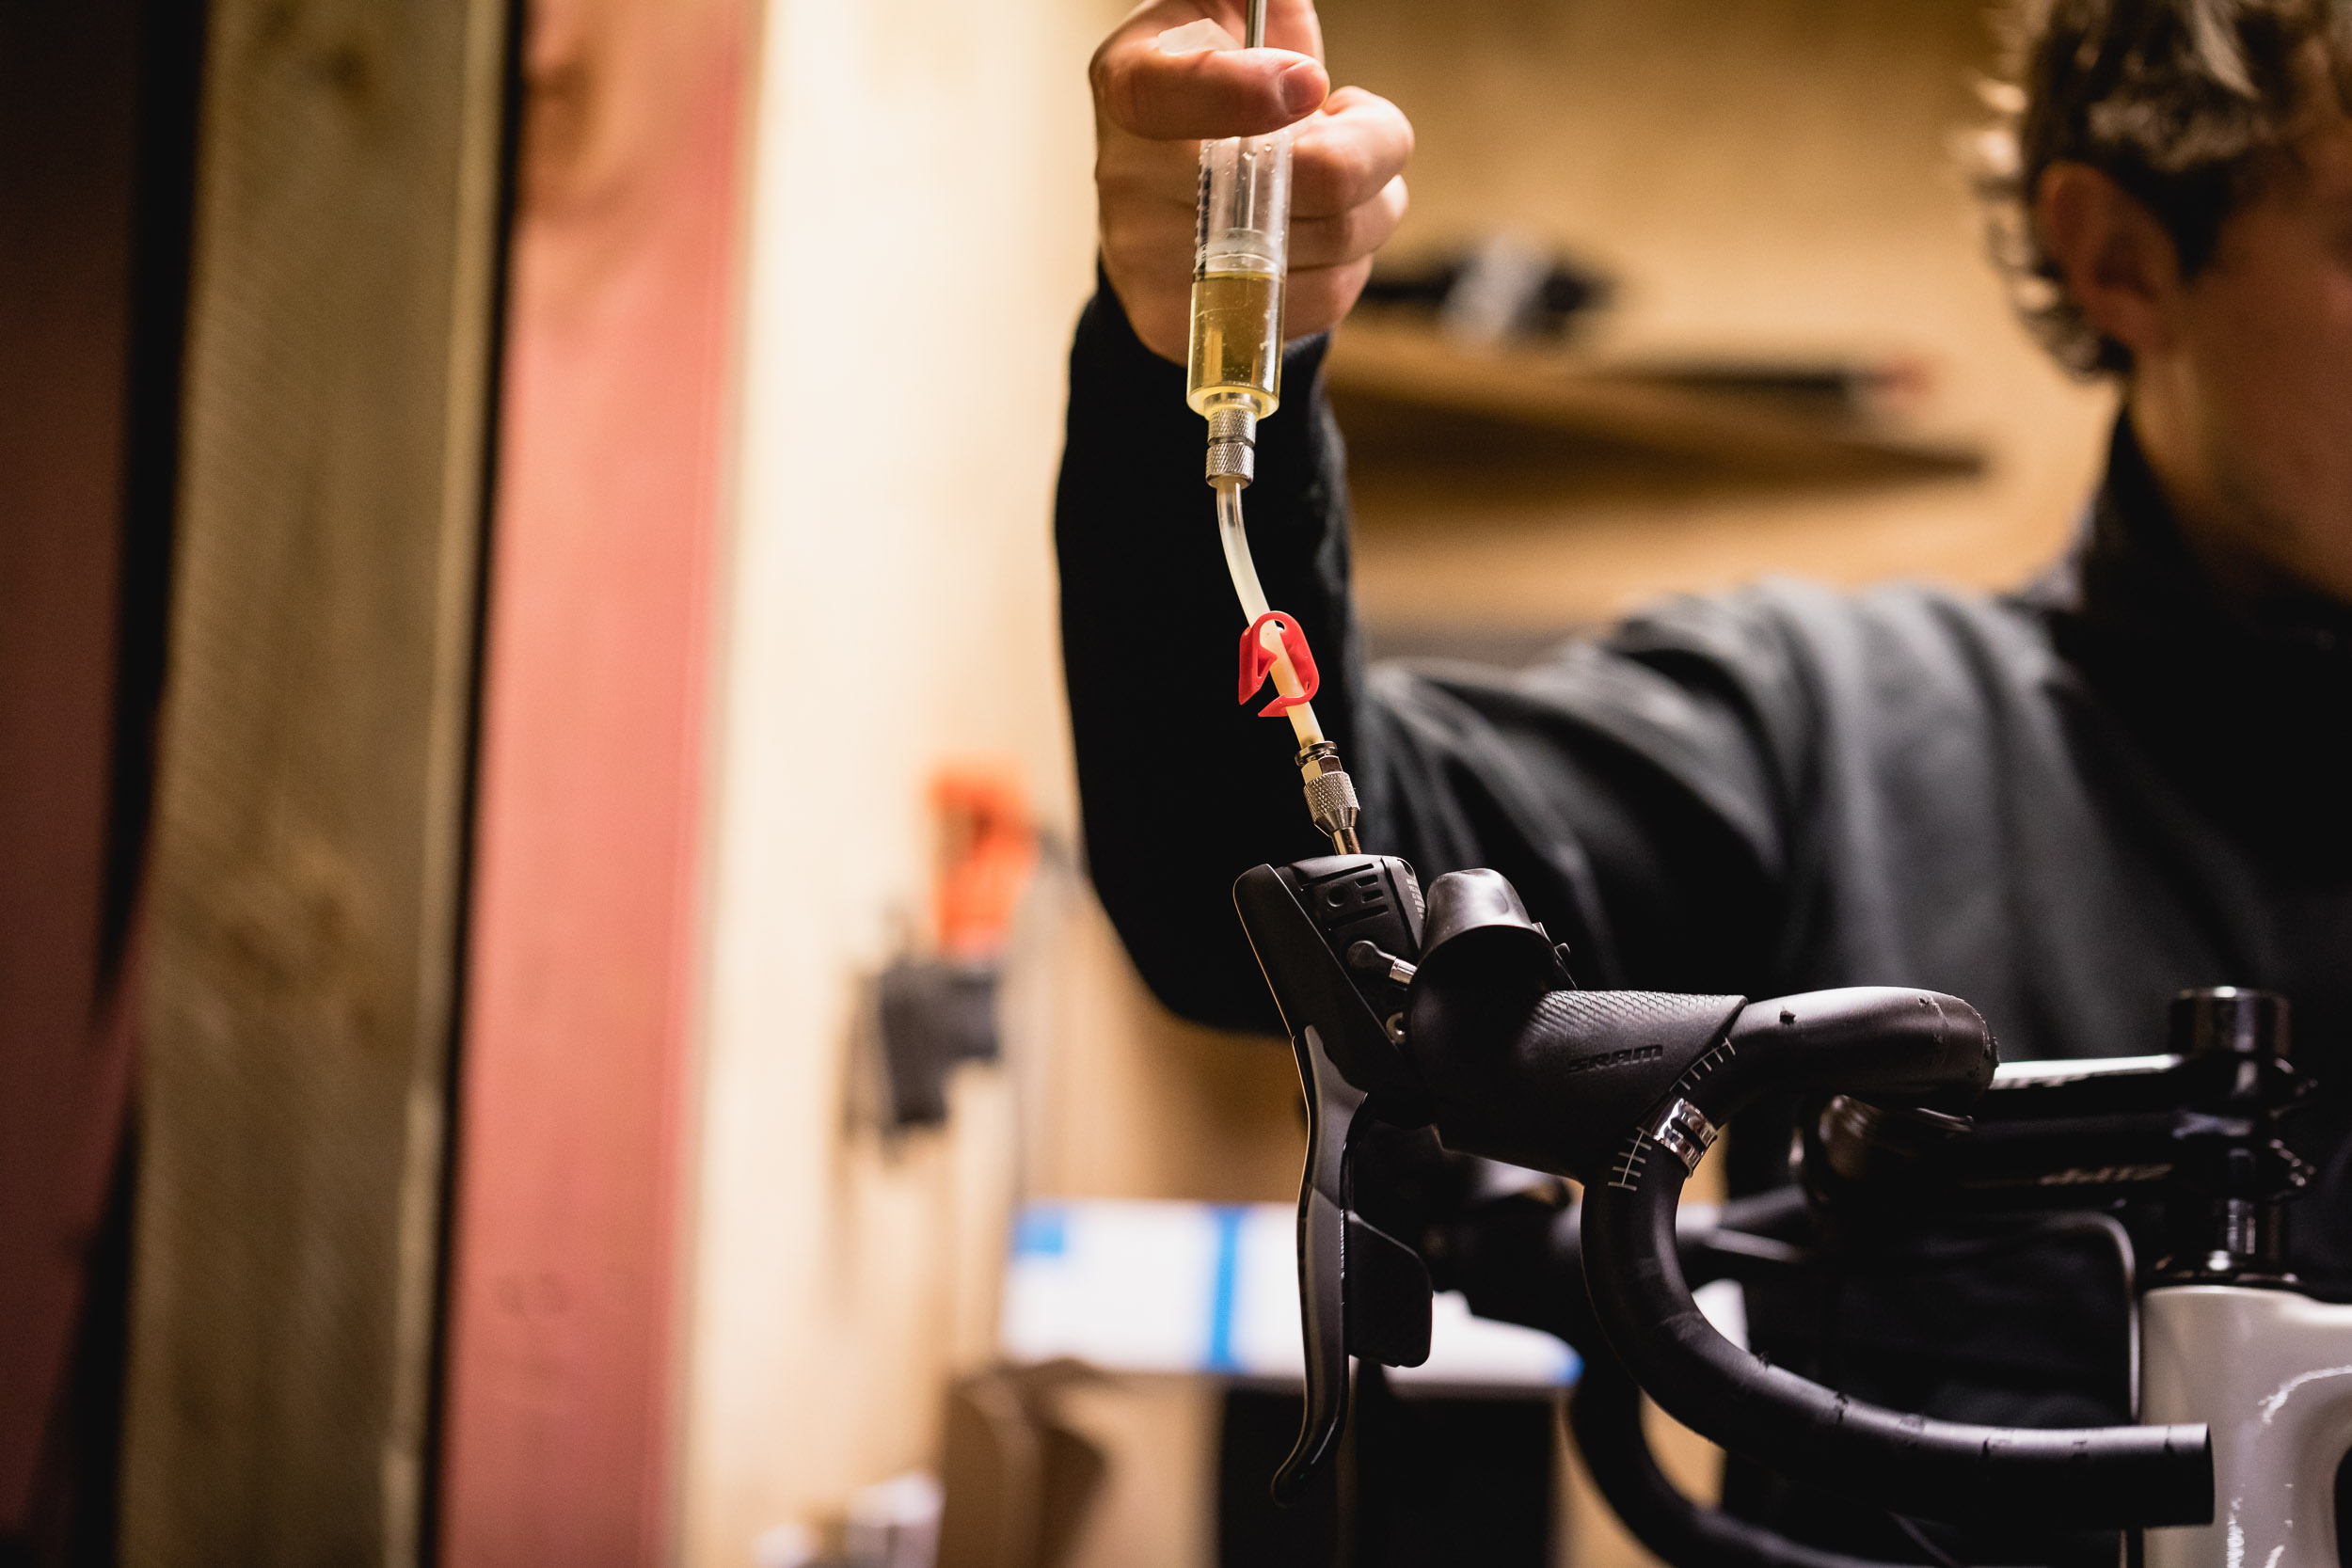
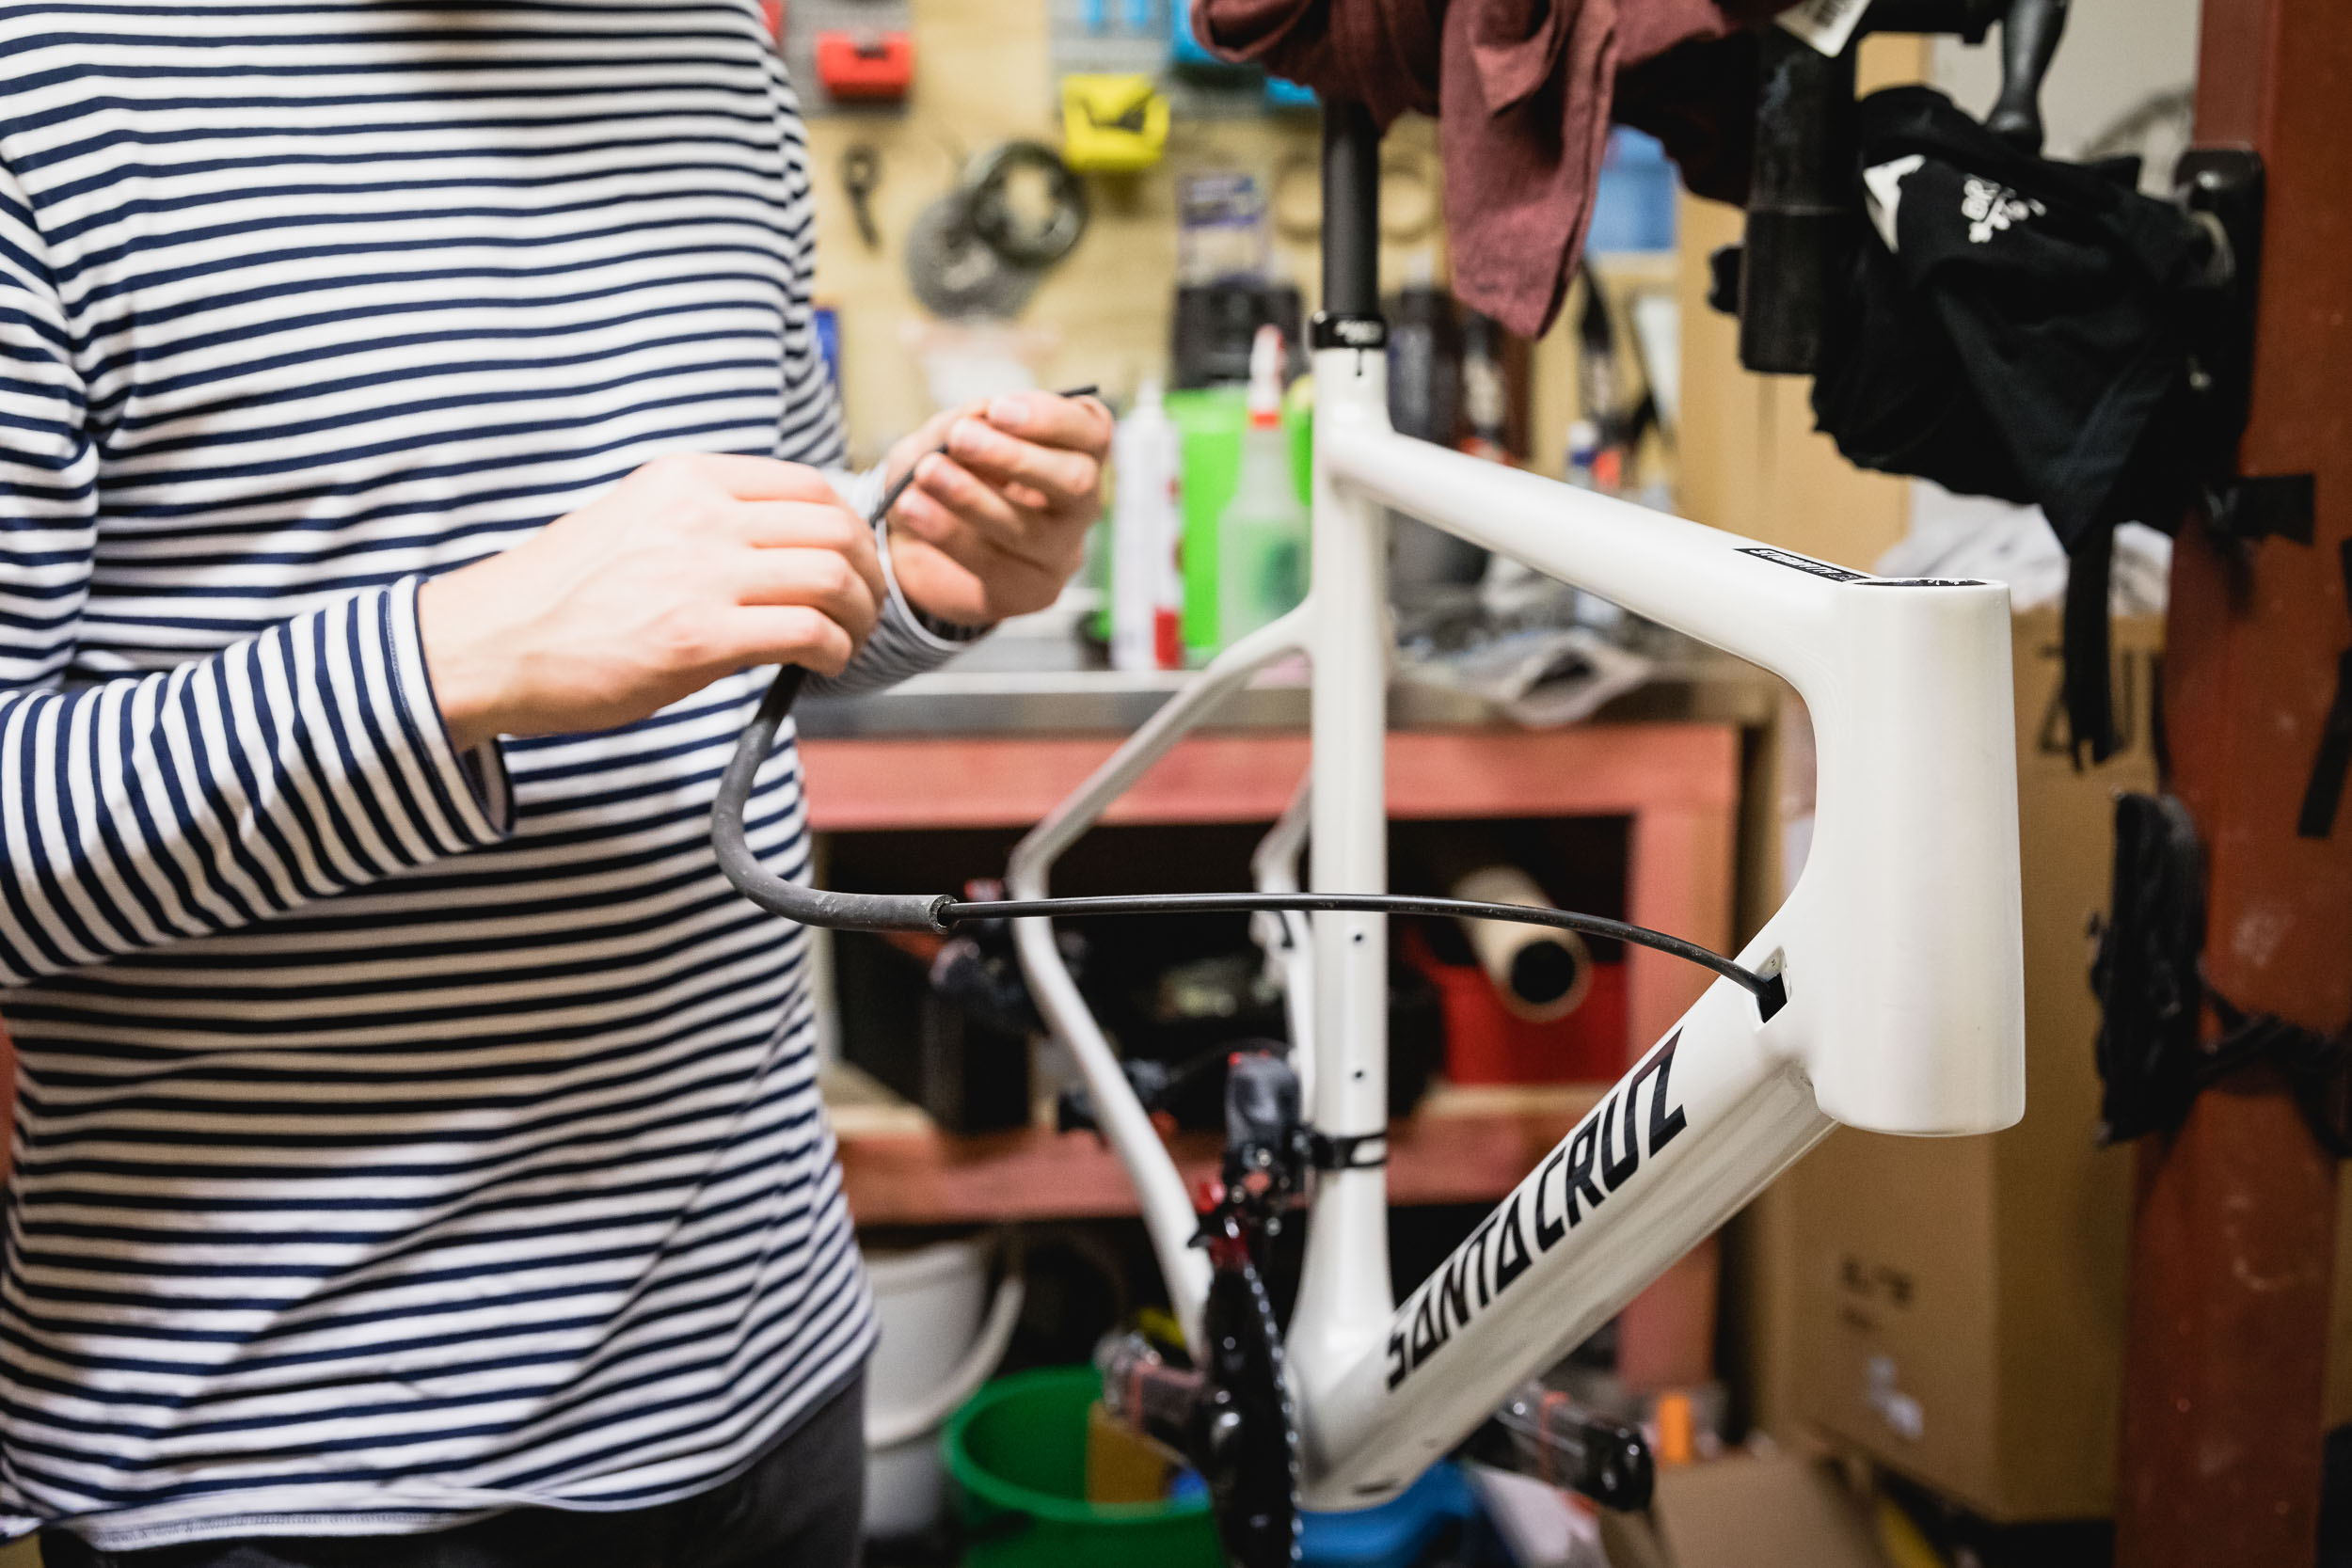
Without a rear gear cable or a dropper post cable running through the frame, it gives the brake hose more room to rattle around, so I was sure to fit a foam sheath over the hose as I routed it through the frame to prevent any undue rattling.
The Ride
Not long after the bike was built, I headed out for a longer jaunt around my hood; a mixed terrain roll, with around 1000m in elevation. The main climb on this ride is a long gravel section of 4km at around 4-6% gradient. However, at the end of the climb, there’s a dash through a walking track which leads you onto an 800m concrete driveway that’s awfully steep. I found a better rhythm on the gravel climb and felt as though my leg turnover was much quicker than usual – it didn’t feel as though I was mashing the gears, even when the dirt, which was wet and sandy, was sucking every amount of energy it could. Onto the concrete driveway, I could get up the steepest part of the climb with a better cadence. Put simply, I was able to turn the pedals over more efficiently.
I noticed the shorter reach out the gate; it makes you feel more ‘over’ the bike. This wasn’t a bad thing as it felt more playful. It’s super responsive and nimble but remains stable when you need it most. In order to get the fit correct, I opted for a 20mm set back seat post which helped me get my position dialled. When the bikes going at full tilt it responds well and is snappy and agile. The bike had the ability to dance over corrugated ruts in the gravel with a sense of ease. I like the fact you can opt for wide tyres, as the wider rubber beaded on tubeless hoops with lower pressure acts like the bikes suspension – of course there’s the frame aspects of being built for gravel and with softened ride quality.
Since the build, the bike’s been used on countless journeys – a few of which grace the pages of this volume. It’s remained consistent, performed well and could take most of the abuse I threw its way. I have to note that having the range of gears offered with the SRAM Force AXS Wide has been critical. I like that the sense of ease and aesthetic of a 1x, but the offering of more range with a 2x, simply seems more logical. When you’re going back and forth from tarmac to gravel you can always find the perfect gear for your leg speed.
From pedalling around my hood to multi-day journeys, this bike has been – and will remain – one of my staples. The fact that it’s custom, with that clean pearl white paint and rad fork, makes it even better.